Baked Brie en Croûte

It’s very apparent that I am a huge fan of cheese.  I don’t care what kind it is, how it aged, who made it, or if it’s soft, hard, or semi-ripe.  It’s all good to me.

Which is why, when I was asked to help with the appetizers and desserts at this year’s Thanksgiving, I was excited to throw this little treat together.  It’s one of my classic favorites, no matter what holiday it may be.  The nice thing is that it is incredibly simple to put together, the ingredients are straight-forward, and you can use a little liberty with your choice of preserves and finger foods to serve it with.  I made it when my family members were starting to gather before the big meal-we always circle the island in the kitchen and munch away at a fancy spread of various crudites and snacks, sharing funny stories and just being ourselves.  I had a few other things on the line-up (posts to follow soon), but this was the one everyone was waiting for.

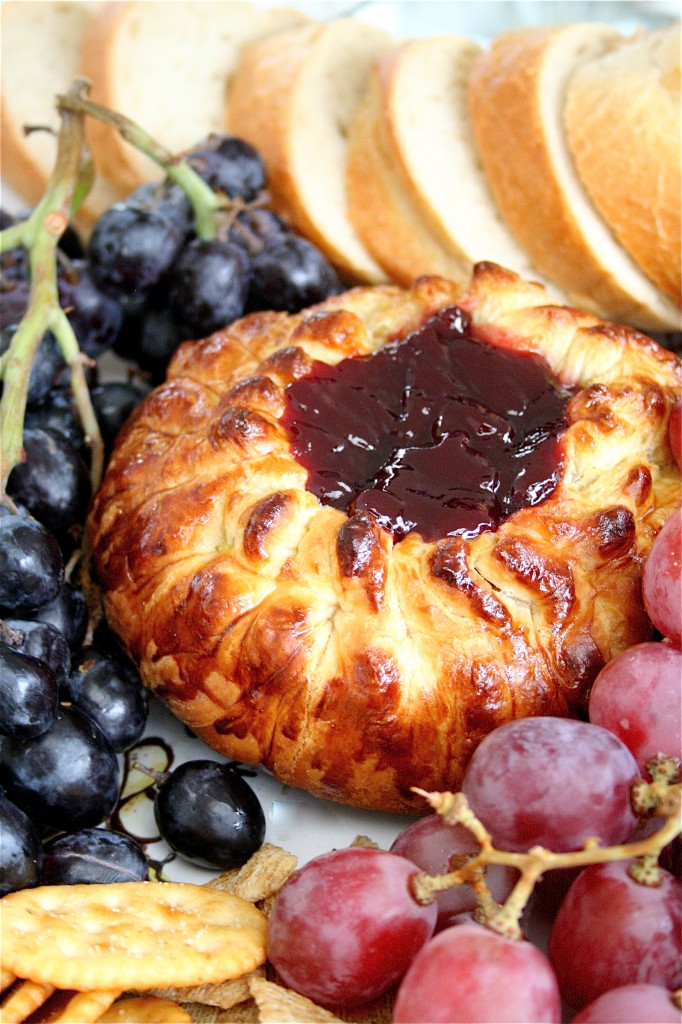
And, it didn’t disappoint.  Does Brie ever disappoint though?  The puff pastry (now, you could probably make the puff pastry yourself, but I was on a time crunch and just went for the store-bought stuff instead) was buttery and golden brown, the cheese underneath it was smooth and warm, and the raspberry preserves (one of my personal favorites) was sweet and so perfect with the cheese.  I served the cheese with grapes, sliced French baguette, and an assortment of crackers.  But, I’ll let you in on a little secret: it’s just simply good enough alone with a fork.  (My gluttony at its finest.)

Baked Brie en Croûte

Servings: 8 to 10

Ingredients

1 (9 by 9 and 1/2-inch) sheet of frozen puff pastry, thawed

1 large egg, lightly beaten

1 (8-ounce) wheel firm Brie cheese

1/4 cup raspberry preserves

Instructions

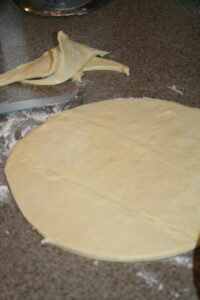
1. Roll the puff pastry into a 12-inch square on a lightly floured surface.

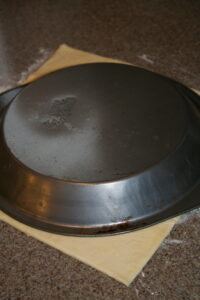
2.  Using a pie plate or other round guide, trim the pastry to a 9-inch circle with a paring knife.

3. Brush the edges lightly with the beaten egg.

4. Place the Brie in the center of the pastry circle and, wrap it in the pastry, creating a fluted edge (see the picture).

5.  Brush the exterior of the pastry with beaten egg and transfer to a parchment-lined baking sheet.

6. Freeze for 20 minutes.

7. Adjust an oven rack to the middle position and heat the oven to 425 degrees.

8. Bake the cheese until the exterior is a deep golden brown, 20 to 25 minutes.

9. Transfer to a wire rack.

10. Spoon the jelly into the exposed center of the Brie.

11. Cool for about 30 minutes, then serve.

P.S. It’s incredibly difficult to take pictures of yourself in a dark kitchen.  🙂  Thanks to my amateur helper.

Source: The America’s Test Kitchen Family Cookbook

December 11, 2010 - 9:24 am

rita - This looks divine… Brie at its finest! Can’t wait to try it.

December 11, 2010 - 7:09 pm

Patty - That looks glorious! What a beautiful scene. The step-by-step photos are very helpful – thank you!

December 11, 2010 - 10:27 pm

Tiffany @ Conor & Bella - Baked brie looks so good!

December 12, 2010 - 5:58 am

Cherine - This would make a perfect appetizer for Christmas!

December 16, 2010 - 8:40 am

Rich - There is nothing wrong with loving cheese, and absolutely everything right about that brie. That looks fantastic!

December 29, 2010 - 10:34 am

Frankie - That looks amazing! And so simple too! hmmm… sounds like lunch. 😀

June 22, 2011 - 5:02 am

The Curvy Carrot » Baked Brie Bites with Pom-Berry Sauce - […] of our family functions, we always have melted baked cheese in one form or another.  I posted the standard Baked Brie around the holidays, so it was only going to be a matter of time until I posted another […]

July 30, 2011 - 8:34 am

The Curvy Carrot » Baked Camembert with Honey and Thyme - […] had made Baked Brie before (and the Baked Brie Bites!), but I had never tried Camembert, a very close sister of Brie. […]

Vanilla Macarons with Bittersweet Chocolate Ganache

I got a crazy idea: I decided that I wanted to attempt macarons again.

And, this time, I planned far in advance.  Stocked up on my colored powders.  Scoured various recipes.  Attempted two different fillings to see which one I would like better (although so good, the almond buttercream was just too sweet with the macarons).  I decided on two different flavors: vanilla and chocolate macarons.  I had it all planned-I bought this really festive baking box to display the macarons in, and I was bound and determined to bring them as a thank-you for the hosts of a recent wine tasting that I attended.  I noticed that the snow was falling pretty intensely outside, and I knew that the moisture might affect my culinary obstacle course, but I shrugged  it off and decided to go full-speed ahead.

Now, the vanilla macarons were hit and miss.  I decided to go with a cheerful yellow and a light pastel pink.  As you can see, I overcolored my pinks.  But that’s ok.  The prepping and baking parts of the macarons weren’t too bad; I jumped for joy when I saw that my first batch, my yellow ones, were growing their cute little “feet” (aka pied).  But I came back over to the oven door less than 30 seconds later and was horrified to see that my cheerful yellow was now a melancholy cross between yellow and light brown.  Ew.  I promptly pulled them out of the oven and realized that, in my anal-retentive need for a beautiful presentation, these simply would not do.  I could not give these ugly ducklings away….as a gift especially.

Round #2.  Pink little “pieds” were sprouting up everywhere on my baking sheet, and I was standing eagle-eyed next to the oven door to make sure that the pink did not turn brown.  Victory.  One baking sheet successful.

Now, on to Round #3.  Chocolate macarons.  I followed everything to a tee-the drying process went smoothly (or so it seemed).  Perhaps I overdried my chocolate macarons.  Because they came out without feet and a slightly cracked top.  Definitely edible. They tasted insanely good, but they were definitely not presentable.  A culinary fail.

So, in the end, I ended up with a single baking sheet’s worth of macarons-which looked and tasted great; however, now I didn’t have anything to fit them in since it was very apparent that I had been over-optimistic when I bought the festive box.  At that point, and after making a large batch of almond buttercream and one hour before the party started, I threw my hands up in defeat and decided that it was time to get ready.  I arrived with two different types of cheeses instead to go with the wine, and all was good.

But, now that I have that box, I am sure I will be attempting these little light and airy French classics until I have enough presentable ones to actually fill the box.

Vanilla Macarons with Bittersweet Chocolate Ganache

Servings: about 2 dozen (or not……)

Ingredients

For the macarons:

2/3 cup ground almonds (aka almond meal/flour)

1 and 1/2 cups powdered sugar

3 large egg whites, at room temperature

5 tablespoons granulated sugar

1 teaspoon vanilla extract

Food coloring powders (optional)

Pastry bags and tips

For the bittersweet ganache:

3/5 cup whipping cream, hot (just put it in a microwave-safe container and microwave for about 45 seconds, or until hot)

1 bar (3.5 ounces) of fine-quality bittersweet chocolate

Instructions

1. For the macarons: Line two baking sheets with parchment paper.

2.  In a food processor, process the almond flour and powdered sugar together to a fine powder.

3. Sift the mixture through a medium-mesh sieve twice.  Set aside.

4. In a stainless steel mixing bowl, beat the egg whites on high speed until they are foamy.

5.  Gradually add the granulated sugar to the egg whites.

6.  Add the vanilla and stir lightly.

7.  Beat the egg white mixture on high speed until stiff, glossy peaks form (about 1 minute).

8. Add half of the sifted flour mixture.  Stir with a spatula while scooping it up from the bottom of the bowl.

9. Add the rest of the flour and mix it lightly in a circular motion.

10.  When the flour is incorporated, press and spread the batter out against the bowl’s sides.  Scoop the batter from the bottom and turn it upside down.  Repeat this step about 15 times.  (This is what is called the Macaronnage.)

11.  When the batter becomes nicely firm and drips slowly from the spatula, the mixture is done. Pour the batter into your pastry bags and twist off the bags to prevent the batter from oozing back out onto your hand.

12.  Using a pastry bag fitted with a standard tip (I used Wilton #1A), pipe the batter into round circles, about 1.5-2 inches in diameter, each about two inches apart.

13.  Rap the baking sheet firmly against the counter or other flat surface.  (Apparently this helps the feet to form…..)

14.  Dry the batter at room temperature, uncovered, for 15 minutes or so.  At this point, place an oven rack in the middle position, and preheat the oven to 375 degrees. (*I had to wait longer due to the moisture outside-in the end, it took about 45 minutes to one hour for me.)  During this process, a slight crust should form on the macarons, and, when you touch this surface gently with your fingertip, the batter should not stick.  When the batter does not stick to your finger, the drying process is complete.

15.  Stack the baking sheet with the macarons on top of another baking sheet and slide both into the oven.

16.  Bake for 15 to 18 minutes, rotating the baking sheets halfway into the baking time.  They should be slightly crisp and crackled on top.

17.  Remove the baking sheet from the oven and cool on a wire rack.

18. For the bittersweet ganache:  Put the chocolate in a bowl and pour the hot cream over it.

19.  Mix slowly, with a whisk, until it becomes glossy.

20.  Cool the mixture to room temperature.  Spread the ganache over the macarons and assemble to form the sandwich shape.

Source: I ♡ Macarons.
December 9, 2010 - 6:58 am

cupcake - I’ll be right over…
Cupcake

December 9, 2010 - 2:12 pm

Lauren at KeepItSweet - these look great even if they are challenging! i have been too afraid to try to make macarons yet

December 10, 2010 - 9:58 pm

Patty - Wowee, the ones that worked look amazing!

December 20, 2010 - 8:33 am

Ildiko - I love love macarons……..thank you for the recepies. I will try to make it.

January 10, 2011 - 6:31 am

Dan - I’m thankful to have found your recipe! I can’t wait to give it a try, though I’ve attempted macarons 3 times and each time met with failure; I hope your recipe does the trick!

February 22, 2011 - 7:26 pm

Janette - I’m so glad I found your blog because I have been looking for directions in adding powdered food coloring. I too am planning in making macaron once again but this time adding color. Thanks

February 10, 2013 - 5:25 pm

Amanda - I did them the way it said and they burnt. However…there could be 2 reasons I’m thinking could have made it go wrong. First, I used gel food coloring because I don’t have powder. Second, I had two sheet pans in at once. The third sheet went in by itself and they were fine. I made chocolate ones (a different recipe) yesterday and they came out perfectly the first time. So I was sad when these burnt!

April 30, 2013 - 2:55 pm

Vanilla Macarons with Bittersweet Chocolate Ganache - […] For recipe visit the source:  thecurvycarrot.com […]

Black Bean Quesadillas

How about something savory?  It seems I’ve had enough sweets lately (consisting of sugar highs, carbohydrate crashes, and tightening work clothes).

I know it’s that time of year for sweets, but, honestly, I need a break.  I’m bombarded right now with pictures of calorie-laden treats, beautiful festive desserts, and endless holiday cookies.  It’s almost too much for someone with a seemingly insatiable sweet tooth.  Anyone else out there feeling the same way?

Well, here’s my non-sweet fix.  And it’s really healthy.  Makes vegetarians happy.  Omit the cheese and have yourself a purely vegan and filling meal.  And, let me add, this recipe makes enough for plenty of leftovers (just double the recipe if you need more than two servings)…which are really awesome.  It’s really easy on your wallet, as well. All you have to do is heat up the leftovers in the microwave, toast a tortilla (or not, if you are at work and don’t have access to a stove-just warm it up in the microwave for a few seconds), sprinkle some cheese on top…and there you go.  Something warm, savory, and completely satisfying.  Now, once we all set our resolutions to take better care of ourselves for the year 2011, you can bet that this recipe will be on my list of go-to healthy recipes.  I love the spice, the flavor, and the variety (feel free to play around with tomatoes, peppers, and other cheeses) that this recipe provides.  And maybe I’ll leave the cheese on.  You know, to satisfy my obsession for cheese.  (There’s always something, right?) 🙂

Black Bean Quesadillas

Servings: 2 folded 8-inch quesadillas

Ingredients

1/3 cup frozen corn kernels, thawed

2 teaspoons vegetable oil, plus more for brushing the tortillas

1/3 cup minced red onion

1 teaspoon minced garlic

1/2 teaspoon chili powder

1/3 cup black beans (canned)

2 teaspoons lime juice

Kosher salt

2 plain flour tortillas, 8-inch

2/3 cup Pepper Jack cheese, in pieces or shredded

Instructions

1. Heat a 10-inch nonstick skillet over medium-high heat until hot, about 2 minutes.

2. Add the corn and cook, stirring occasionally, until kernels begin to brown and pop, 3 to 5 minutes; transfer corn to medium bowl.

3. Heat 2 teaspoons vegetable oil in now-empty skillet over medium heat until shimmering; add red onion and cook, stirring occasionally, until softened, about 3 minutes.

4. Add garlic and chili powder and cook until fragrant, about 1 minutes; stir in beans and cook until heated through, about 1 minute.

5. Return corn to skillet and toss to combine; gently press mixture with spatula to lightly crush black beans.

6. Transfer mixture to now-empty bowl, stir in lime juice, and season to taste with salt.

7. Wipe out the skillet with paper towels and return pan to medium heat until hot, about 2 minutes.

8. Place 1 tortilla in skillet and toast until soft and puffed slightly at edges, about 2 minutes.

9. Flip tortilla and toast until puffed and slightly browned, 1 to 2 minutes longer.

10.Slip tortilla onto cutting board.

11. Repeat to toast second tortilla while assembling first quesadilla.

12. Sprinkle 1/3 cup cheese, half the corn and bean mixture over half of tortilla, leaving 1/2-inch border around edge.

13. Fold tortilla in half and press to flatten.

14. Brush surface generously with oil, sprinkle lightly with salt, and set aside.

15. Repeat to form second quesadilla.

16. Place both quesadillas in skillet, oiled sides down; cook over medium heat until crisp and well browned, 1 to 2 minutes.

17. Brush surfaces with oil and sprinkle lightly with salt.

18. Flip quesadillas and cook until second sides are crisp and browned, 1 to 2 minutes longer.

19. Transfer quesadillas to cutting board; cool about 3 minutes, halve each quesadilla, and serve.

Source: Cook’s Illustrated.

December 7, 2010 - 9:09 am

rita - Yum, looks delicious… and I have all the ingredients to make these, right down to a little container of leftover black beans that I’ve been pondering what to do with. Thanks! 🙂

December 7, 2010 - 7:00 pm

notyet100 - drooling here,..:-)

December 8, 2010 - 1:03 am

Jara - I love the flavour combos in this quesadilla especially the vegetarian kind. I definitely don’t miss the meat with the combo that’s going on here. thanks for sharing! 🙂

December 9, 2010 - 3:45 pm

Aku - Oh, yum. Yes please. These look soooo delicious!

October 5, 2011 - 6:51 pm

Kalysta - Made this tonight for dinner! Huge hit with everyone, so delicious, easy, and very filling. This is definitely going to be a regular meal. Thanks for sharing!

November 11, 2011 - 3:42 pm

Laura K - These look absolutely delicious! I am curious, have you ever made these up ahead of time and frozen them?

November 11, 2011 - 5:05 pm

srlacy - Hi Laura-
Nope, I haven’t. But if you experiment a little, please let me know how they turn out. 🙂

January 5, 2012 - 2:10 pm

Michelle - I’ve made these quesadillas several times now. SO easy and SO delicious. I add some homemade pico de gallo for a little extra flavor and use wheat tortillas instead of the flour. My husband isn’t always keen on vegetarian dishes, so I add chicken or beef to his.

It’s my go-to for a quick and easy meal!

March 25, 2012 - 8:28 pm

Denise - Made these tonight for my family. My 7 year old didnt want to try them because of the beans- but when he did he ate it all up and scored it a 10! this is going on rotation and so easy to make

July 10, 2012 - 3:15 pm

Budget-Friendly Cooking « Eating Made Easy - […] image source […]

November 29, 2012 - 9:01 pm

Laura - These were really good. I doubled the recipe and it was perfect for 2 people. I used whole wheat tortillas. I would use a griddle next time to speed up the cooking process. I will make these again.

December 28, 2012 - 10:15 pm

Chris - These are delicious!!! I’m so glad I tried them. I made 6 of them for 4 of us….not sure we’ll have left overs.

January 14, 2013 - 9:02 pm

Jennifer - Tried these tonight and they were yummy! I added avacado to mine right before cooking the tortilla it was yummy!! Next time I would double the recipe and skip the oil and salt on the tortilla because I personally didn’t feel like I needed it 🙂

February 19, 2013 - 8:51 pm

Erika - I agree about the salt. I used just a little EV olive oil to make it crisp. Also added avocado. I also added a little lean ground beef and some extra chili powder to flavor it so that it had some more protein. Turned out delicious.

March 23, 2013 - 8:31 pm

JenB - Fellow readers, this is an excellent recipe! Easy and delicious! My husband and I frequently split a can of black beans for our quesadillas so I doubled the remaining ingredients to carry the flavor through the larger quantity of beans. I used cheddar instead of pepper Jack and didn’t have fresh lime but still they were so yummy!

Another delicious alternative is to toss the warmed bean mixture on top of a bed of lettuce and top with fresh avocado and salsa (or pico de gallo if you have it)! Absolutely scrumptious!

September 25, 2013 - 10:53 pm

Black Bean Quesadillas | Exceptionally Everyday - […] capabilities, which is what I ended up doing for dinner tonight.  I’d found this recipe for Black Bean Quesadillas a few months ago on The Curvy Carrot and was saving them for a quick, but delicious, meal for […]

November 10, 2013 - 10:16 pm

Kendra VONESH - Absolutely fabulous! Whole family loved it! Will definitely make again,!

January 2, 2014 - 12:33 pm

Bookish and Not-So-Bookish Thoughts – 1/2/14 | Addled By Books - […] the new year, among my resolutions is to cook in more, and order out less. Up for dinner tonight, this quesadilla recipe. I’ve made it a bunch of times, and we loooooooove […]

January 9, 2015 - 11:18 am

Fantastic Food Friday- Black Bean Quesadillas | Changing My Balance - […] from The Curvy Carrot and My Worldwide Culinary […]

March 17, 2015 - 6:55 pm

Shauna - Tried this out last Friday, on our Mexican themed dinner for two! I love it, but my husband loves it even more! and he requested that I should make them tonight too! This will surely be a fav in our family, I do add a bit more chill powder since we love our spice. Thanks for sharing!