

.jpg)
I know I just posted a Cheddar Ale Soup. But I’ve kind of been on a serious beer/cheese kick lately. I think it’s the combination of dark evenings, cold rainy weather, and a fully packed DVR that I cannot seem to ever get less than 98% full.
Eating cheesy food/watching TV on dark nights is way easier than feeling inspired to prep a lot of vegetables and go for a run outside. I’m just saying.
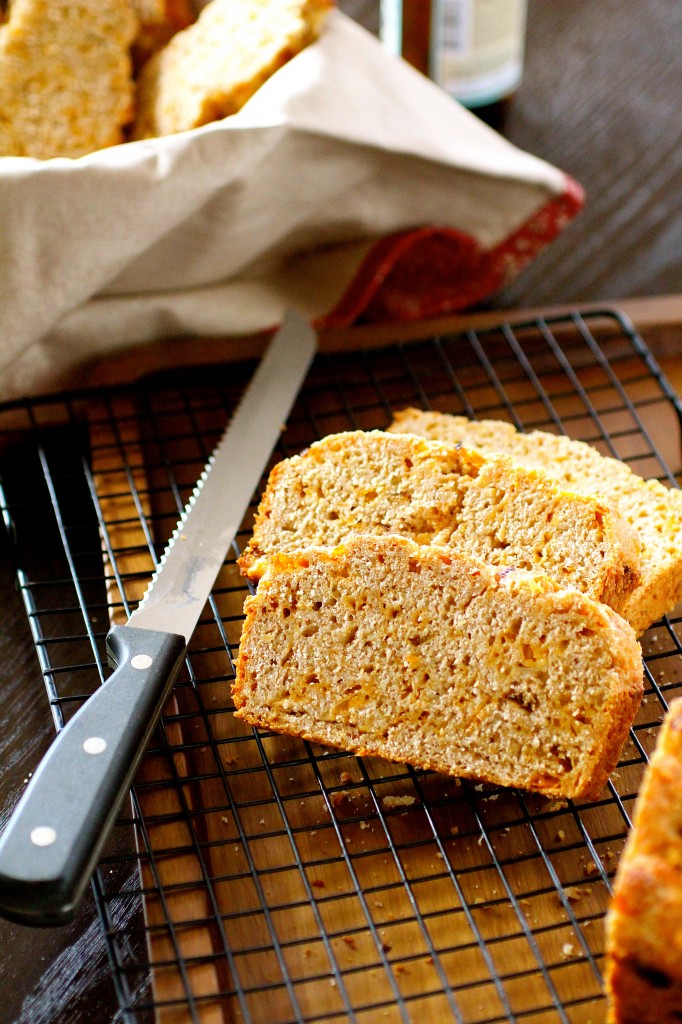
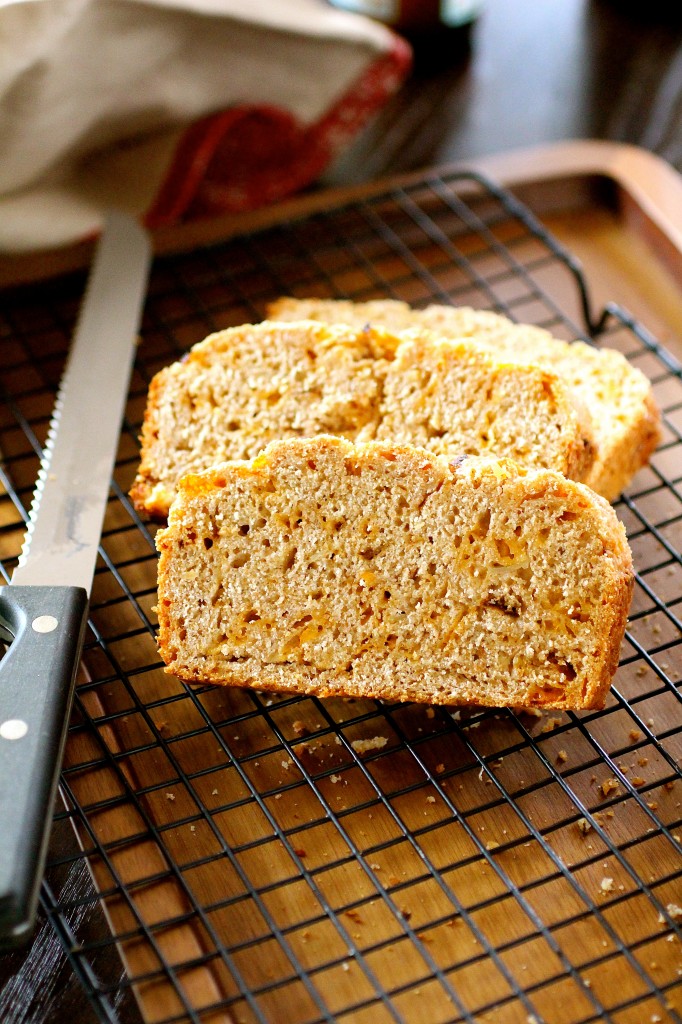
I played around with whole wheat flour here. The original recipe called for exclusively all-purpose flour, so I substituted in half whole wheat flour. The bread definitely had a denser consistency with the whole wheat flour, but I found that I actually prefer a denser bread (especially if a big chunk is going to be served with a hearty soup/stew). As far as type of cheese goes, use whatever kind you like. I went with a sharp cheddar, which I loved. Next time I might do a combination of cheeses just to make it interesting.
I’m serving this as my “bread” this year for Thanksgiving. Served warm with a bit of melty butter on top? I might skip the rest of the meal and just eat the whole loaf by myself. Yay for carbs and cheese.
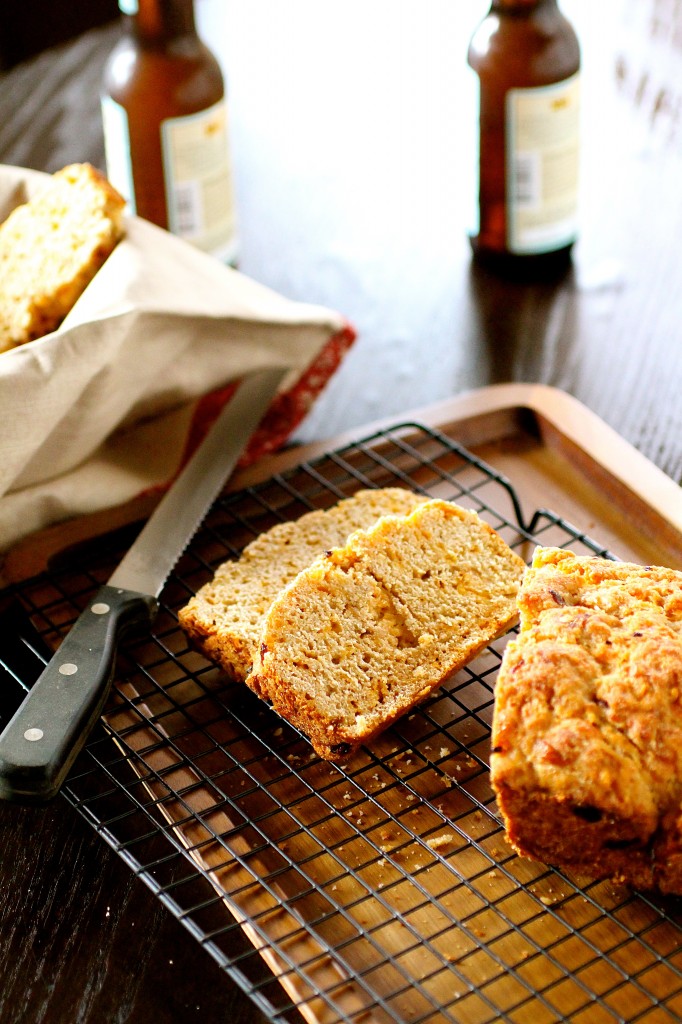
Whole Wheat Beer Cheese Bread
Servings: 1 loaf (I used a 10-inch bread pan. The original recipe calls for a 9-inch loaf pan.)
Ingredients
1 tablespoon extra-virgin olive oil
1/2 cup yellow onion, finely chopped
1/4 teaspoon black pepper
1 garlic clove, minced
1 and 1/2 cups all-purpose flour
1 and 1/2 cups whole wheat flour
3 tablespoons sugar
2 teaspoons baking powder
1 teaspoon salt
1 cup (4 ounces) shredded cheddar cheese
1 (12-ounce) bottle lager-style beer
Cooking spray
2 tablespoons melted unsalted butter, divided
Instructions
1. Preheat oven to 375 degrees and spray your bread loaf pan thoroughly with cooking spray.
2. In a small frying pan over medium-low heat, heat the olive oil until shimmering.
3. Add the chopped onion to the pan; cook until lightly browned, about 5-10 minutes stirring occasionally.
4. Add the pepper and garlic; cook 1 minute, stirring constantly. Remove the pan from the heat and set aside.
5. In a large bowl, whisk together the flours, sugar, baking powder, and salt.
6. Add the onion mixture, cheese, and beer to the flour mixture, stirring just until moist.
7. Pour the batter into your prepared loaf pan and lightly drizzle 1 tablespoon of the melted butter over batter.
8. Bake for 35 minutes, and then lightly drizzle the remaining 1 tablespoon butter over batter.
9. Bake for an additional 25 minutes or until deep golden brown and a tester inserted into the center comes out clean.
10. Cool in pan for at least 5 minutes before handling.
Source: Adapted from Cooking Light as part of my monthly contribution to the Cooking Light Bloggers’ Connection.


Katrina @ Warm Vanilla Sugar - Beer bread makes me freaking happy. Love this!
Maria Tadic - This looks so yummy! I love breads like this. I definitely wanna try this along a big bowl of warm soup!!
Joanne - I’ve done parmesan beer bread before (SO.GOOD) but somehow missed the memo on cheddar!! Need to amend that with the gazillion bottles of pumpkin beer I always seem to have around!
Amelia - Shanon, you had me at “beer” and “cheese.” YUM!! I can’t wait to make this.