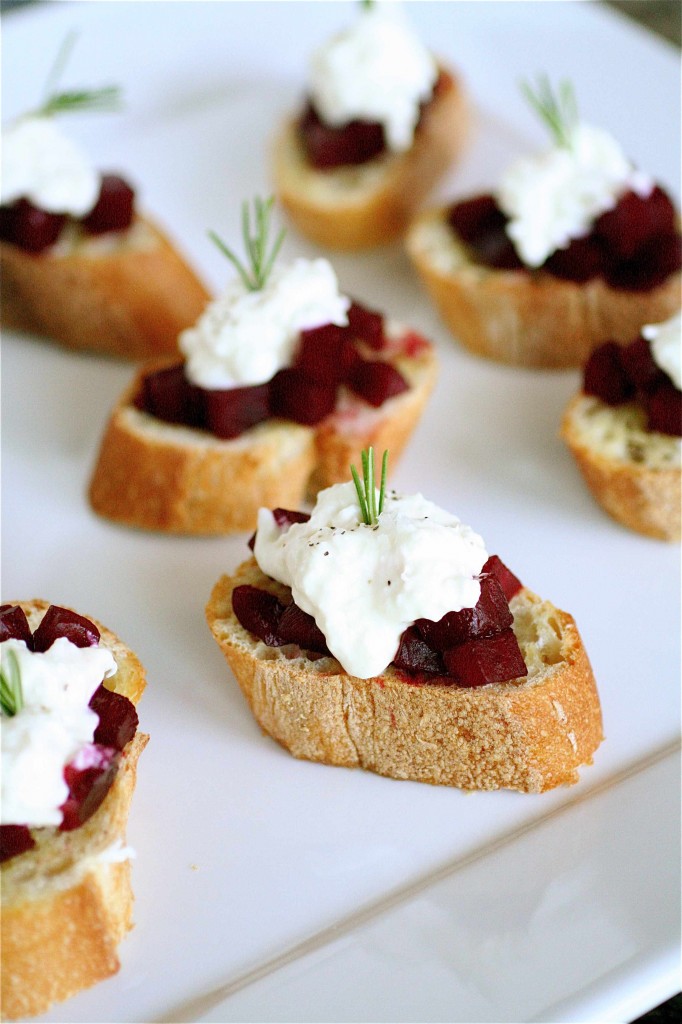
Glazed Beet and Burrata Toasts


I haven’t ever really tried cooking with beets.  Maybe it was the fear of pink-stained hands or a funky root vegetable taste that I wasn’t sure if I would like.  I wasn’t even sure of how to cook one.  I knew my mom liked them; I knew I had a friend back home who would bring a can opener to work and eat beets straight out of the can; I knew that they always looked so pretty with their deep fuschia hue, usually paired with the bright white contrast of some sort of cheese.

I saw this recipe in a recent issue of Food and Wine and immediately bookmarked it.  I’ve had the luxury of having access to fresh Burrata here in New England, and it has quickly become one of my favorite types of cheese.  Soft mozzarella with a creamy filling-I’ve been known to get a ball of it and eat it with some sea salt and crackers-in pure gustatory satisfaction.  It pretty much rules, people.

So, I figured I would try this one out, and if I didn’t like the beets, then at least I could still eat the burrata on the French bread.  I wasn’t disappointed.

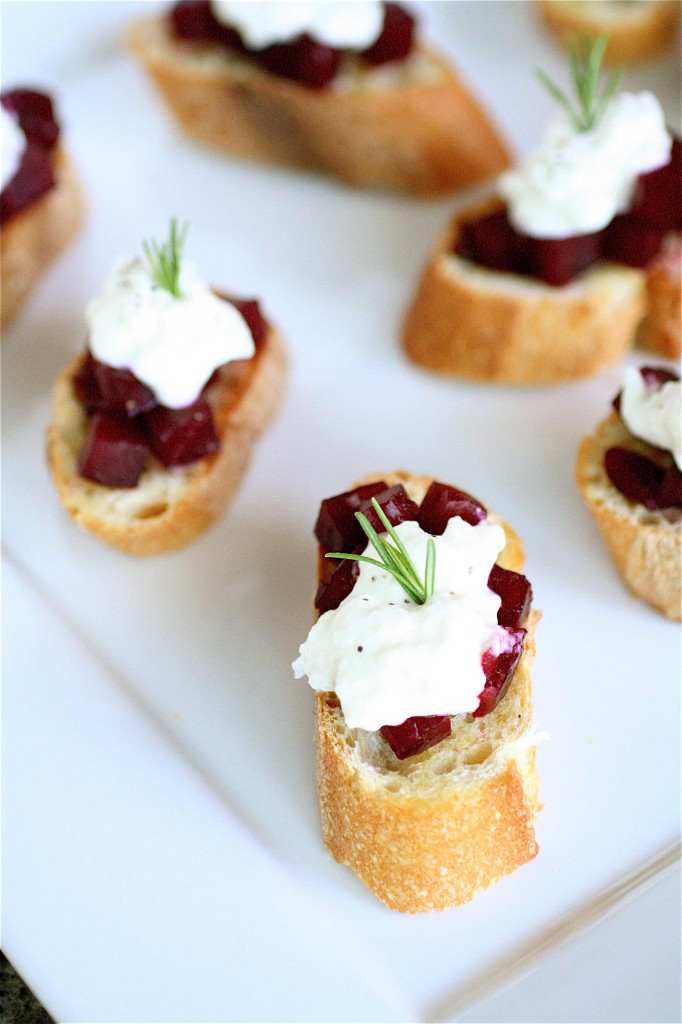
The beets take on a tangy but sweet pickled flavor.  They are soft and slightly chewy in texture.  Combined with the contrast of the creaminess of the cheese and the slight crunchiness of the toasted bread, it’s pretty much a match made in heaven.  I ate the leftovers (a sign of a success, in my book) as a small salad over some greens the following night since I had used all of the bread, so you could honestly just use this recipe as a nice salad topper if you are gluten-free or cutting back on carbs.
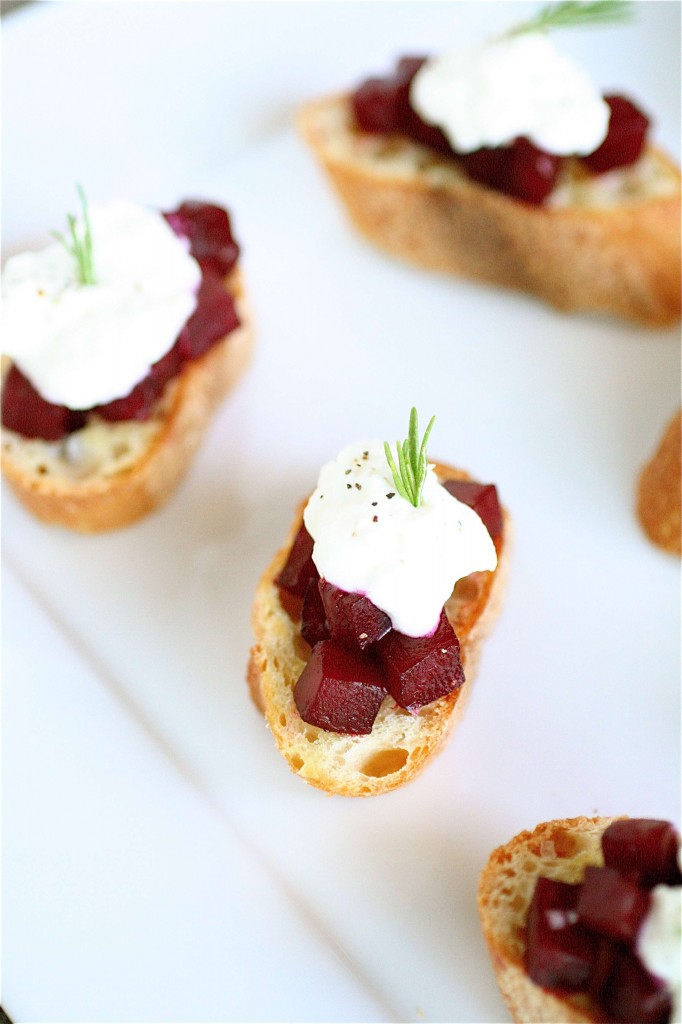
Glazed Beet and Burrata Toasts

Servings: 4 servings


Ingredients

3 beets (3/4 pound total)

4 sprigs of thyme

1 teaspoon black peppercorns

1 tablespoon red wine vinegar

1/2 cup sherry vinegar

2 tablespoons sugar

1 sprig of rosemary

Sea salt and pepper, to taste

One loaf of French bread (or bread of your choice), sliced diagonally, and lightly toasted

1/2 pound burrata cheese, cut into rough pieces

Fresh herbs, for garnish, optional
Instructions

1. In a large saucepan, cover the beets completely with cold water.

2. Add the thyme, black peppercorns, and red wine vinegar to the pot, and bring the mixture to a boil.

3. Simmer, partially covered, for about 45 minutes to an hour, or until the beets are soft, adding water if necessary.

4. Drain, and let the beets cool.  Once you are able to handle them, peel and cut them into a 1/4-inch dice.

5. Return the beets to the saucepan and add the sherry vinegar, sugar, rosemary, and 1/4 cup of water and bring to a boil.

6. Cook over medium-high heat until a thick glaze forms, about 12-15 minutes or so.  Season with salt to taste.  Discard the rosemary.

7. To assemble the toasts, place about a tablespoon of the beets onto each piece of bread.  Top with a piece of cheese and sprinkle with salt and pepper, and garnish with fresh herbs, if using.


Source:  Barely adapted from Food and Wine.


June 4, 2012 - 7:47 am

Katrina @ Warm Vanilla Sugar - Yum! I love beets in pretty much anything and this is such a unique way to use them. Love it!

June 4, 2012 - 8:17 am

Jaclyn - Beets are my absolute favorite food. I can’t wait to try them in this recipe!

June 4, 2012 - 8:32 am

Maureen @ Orgasmic Chef - holy cow these sound good! I love beets in most every way.

The only thing I would add is to wear rubber gloves to peel the beets and then you don’t need to spend the time to get the red off. 🙂

June 4, 2012 - 10:32 am

Jillian {Her Split Ends} - ohhhhhhh these sounds fantastic!! Beets are so yummo AND did you know they are the closest thing in nature to our blood…so they are excellent for filtering impurities out of your blood and for blood circulation!!

Cheers
~ Jillian
http://www.hersplitends.com

June 4, 2012 - 1:18 pm

Ashley @ Wishes and Dishes - These look amazing… your photos are all so gorgeous!

June 4, 2012 - 3:26 pm

Chung-Ah | Damn Delicious - I’m loving this, and I’m not even a beet person!

June 4, 2012 - 6:43 pm

Ann P. - I just started to like beets, so this is a perfect appetizer to try 🙂 It does sound delicious on a salad topper, and it would give me a chance to try burrata as well! The way you described it with the sea salt and crackers sounds heavenly!

June 5, 2012 - 9:54 am

Angie@Angie's Recipes - These are some wonderful open sandwiches! I love it.

June 5, 2012 - 1:52 pm

elisabeth@foodandthrift - Hi Shannon, Just found your blog by chance…pinned your amazing eggs in tomato cups, on Pinterest. Wanted the recipe so bad, because it’s so unique pretty, and oh, so yummy! The photos are superb, just as your Glazed Beet and Burrata Toasts recipe, and photo!
I don’t see that you have a google follow, but will “like” you on facebook, which I’m rarely on these days, but will spend more time.
I invite you to visit my blog, and follow!

June 5, 2012 - 10:06 pm

elly - I adore beets and I LOVE burrata. These look really awesome, and they’re so pretty too!

June 10, 2013 - 5:00 am

Roasted Balsamic Beet Salad » The Curvy Carrot - […]  Beets.  Roasted beets.  I had never been a big fan of beets until about a year ago when I made this.  Recently, I was having brunch with a friend, and he decided to order a roasted beet salad for us […]

January 18, 2014 - 10:01 am

Roasted Balsamic Beet Salad - Eating Made Easy - […] was my friend Shanon, until she made these Glazed Beet and Burrata Toasts which changed her feelings about beets forever. Since then, she’s come up with some fabulous […]

Cheesecake Ice Cream

Cheesecake.  Ice cream.  Cheesecake ice cream.  Yes, it can be done.

This is the kind of thing that you only want to make once in a while.  For special occasions or for a girls’ night or for something celebratory. Because this is a whole kind of new experience with ice cream.

I thought about adding in some bits of fresh fruit, I really did-raspberries or blueberries or even a caramel swirl.  But, I was a little skeptical about messing with this recipe too much.  I mean, this was something that I wanted to savor in its simple self-it’s rich, creamy, “man I deserve a little of this love” kind of self.  In all honesty, the end result was more tangy (think about an actual piece of soft, frozen cheesecake) than I expected, so you if you have add-ins, I would go for it.  Or make yourself a little berry sauce to go on top.

I went for sprinkles.  (of course).

And, as a sidenote:

HAPPY 22nd BIRTHDAY to my baby sister, Sam!

and….

HAPPY WEDDING DAY to Jill and Blake!


Cheesecake Ice Cream

Servings: about 1/2 gallon


Ingredients

6 ounces cream cheese, softened but still cool

3/4 cup superfine sugar (**give regular granulated sugar a few pulses in your food processor instead of buying a bag of superfine sugar)

1 cup cold sour cream

1 cup cold heavy cream

Pinch salt

3 tablespoons fresh lemon juice

1/4 teaspoon vanilla


Instructions

1. Chill a mixing bowl and the beaters of an electric mixer (or your stand mixer-use the paddle) in the fridge until cold, preferably overnight.

2. Beat the cream cheese at medium speed until soft and smooth, about 3 minutes.

3. Add the sugar, 1/4 cup at a time, mixing well after each addition.

4. Add the sour cream and the heavy cream, mixing until smooth.

5. Add the salt, lemon juice, and vanilla until thoroughly incorporated.

6. Cover the bowl tightly with a lid or plastic wrap and let chill overnight or until very cold (I would recommend chilling it overnight.)  Make sure that you wash and dry the beaters (or paddle) and return them to the fridge to chill again as well.

7.  The next day, beat the mixture on medium low speed for about 3 minutes, or until very smooth.

8. Pour the mixture into your ice cream maker and make the ice cream according to the manufactuer’s instructions.

9. Return the finished product to the freezer and let chill until frozen.  Let soften slightly at room temperature before serving.


Source:  Food and Wine.


June 2, 2012 - 7:53 am

Katrina @ Warm Vanilla Sugar - Oh boy! This sounds so fabulous!

June 2, 2012 - 10:07 am

Christina @ This Woman Cooks! - I think I’ll add some blueberry filling, what do you think?

June 2, 2012 - 10:40 am

srlacy - Hey Christina!
Go for it-sounds amazing!

June 2, 2012 - 5:12 pm

Ann P. - One more reason to get an ice cream maker! Got any recommendations?

June 3, 2012 - 10:03 am

Chung-Ah | Damn Delicious - This is my absolute favorite flavor of ice cream! Can’t wait to try this!

June 3, 2012 - 6:15 pm

srlacy - Hi Ann-

I have only used the attachment that I ordered for my KitchenAid mixer-and I love it. It’s so easy. The only downside is that you have to have the bowl completely frozen before using, and the bowl itself takes up a ton of space in my freezer. I figure any other ice cream maker has the same issue, though. 🙂

June 3, 2012 - 9:50 pm

Claire - This is healthier than cheesecake since there is no crust full of butter! 😉

June 4, 2012 - 3:38 am

Maureen @ Orgasmic Chef - How easy and gorgeous is this??

June 5, 2012 - 5:06 pm

natalie@thesweetslife - i can’t get over how perfect this ice cream looks! I’ve made strawberry cheesecake ice cream but i have got to try this!!

June 19, 2012 - 7:56 pm

Frozen Concoction - Wow! Heavy cream, sour cream and cream cheese. Oh my!

July 30, 2012 - 7:25 am

Cheesecake Ice Cream | Lukor.net - […] View the article’s source Autor: srlacy […]

May 8, 2013 - 10:20 am

Cheesecake Ice Cream - […] source:   thecurvycarrot.com […]

July 13, 2013 - 4:25 pm

Super Saturday | I'll Have Seconds! - […] Cheesecake Ice Cream from The Curvy Carrot […]

Huevos Rancheros in Tortilla Cups


And this recipe pretty much sums up things that I have in my fridge or pantry at all times:  eggs, beans, random tortillas, leftover cheese, and salsa.

I’m challenging myself to be creative right now: how many things can I use up from the fridge or pantry in the next two weeks and actually have decent things to eat?  I’m going through bags of flour (homemade bread, anyone?), endless PB & J’s (from the obnoxiously huge container of peanut butter that I somehow thought I would need), and more rice concoctions than I could ever imagine.  It’s going well. 😉

This past weekend I decided to make myself an awesome breakfast (after a hiking trip that ended prematurely due to swarms of black flies…seriously), and as I stared into the fridge, I realized that it was not only possible, but it was going to be one of the best breakfasts that I had had in a long time.  Huevos rancheros are pretty awesome, but to have them in their own individual tortilla cups would be even better (and use up those nearly stale tortillas that I had stashed away in the cheese drawer).

Throw in whatever you have on hand.  I actually had some dried beans on hand that I wanted to use, so I took a little extra time to cook them down before making this.  If you have dried beans on hand and you have more foresight than myself, soak them overnight before cooking for the best results.

A forewarning:  the tortillas WILL crisp up and brown significantly with about 8-10 minutes left in the baking process.  Have some aluminum foil on hand to cover the ramekins with about 8-10 minutes left-the eggs will continue to cook, but the tortillas won’t turn into soot.  Enjoy!


P.S.  Since the archives and the “subscribe” button have both been out of service (who knows why…still can’t figure it out…), I’ve created a flickr account where you can see my entire gallery (with links back to the recipes!) and subscribe.  Check it out:

http://www.flickr.com/photos/thecurvycarrot/


Huevos Rancheros in Tortilla Cups

Servings: 4


Ingredients

2-3 tablespoons olive oil, divided

Four 6″ flour tortillas

Sea salt

One 15-ounce can of black beans, drained and rinsed (or use your own)

1 and 1/2 cups pinto beans (or a 15-ounce can), drained and rinsed

1/2 teaspoon cumin

1-2 tablespoons fresh cilantro, chopped (or to taste)

4 large eggs

3/4-1 cup Monterey Jack cheese, shredded

For garnish:  fresh salsa, Queso Fresco, green onions, etc.

Instructions

1. Preheat the oven to 350 degrees.

2. Lightly brush the inner surfaces of four ramekins with olive oil.

3. Gently press each tortilla into each ramekin, folding over the sides slightly if necessary (it may help to warm the tortillas in the microwave first).

4. With a silicone brush, lightly brush the surfaces of the tortilla with the olive oil and sprinkle with a pinch of sea salt.

5. In a large bowl, combine the beans, cumin, 1/2 tablespoon olive oil, and the cilantro, making sure to slightly mash the beans together.

6. Spoon a generous amount (about 2/3 cup) of the bean mixture into each tortilla cup.

7. Carefully crack an egg into the center of each tortilla cup.

8. Lightly sprinkle the egg surface with cheese.

9. Bake for 27-30 minutes, or until the whites of each egg are set.  **Don’t forget to cover the ramekins with a sheet of foil if the tortillas start to brown too much.  Serve immediately.


Source:  Adapted from Bon Appetit, via Epicurious.


May 31, 2012 - 7:37 am

Katrina @ Warm Vanilla Sugar - This is so fun! And easy…love it!

May 31, 2012 - 1:07 pm

Ann P. - It’s 10 already, but I think I am ready for second breakfast! Gorgeous shots, and such a creative and fun idea with the tortilla cups!

May 31, 2012 - 2:08 pm

Chung-Ah | Damn Delicious - How innovative! I absolutely love these, and they’d be perfect for a brunch get together.

May 31, 2012 - 2:37 pm

Christina @ This Woman Cooks! - Awesome idea! I’ve always got those ingredients on hand too. Yum!

May 31, 2012 - 3:29 pm

Jillian {Her Split Ends} - SOUNDS AMAZING!!! I can’t wait to try!!

Cheers
~ Jillian
http://www.hersplitends.com

May 31, 2012 - 8:13 pm

Larkin - Thanks, I just made these for dinner and they were great!

June 2, 2012 - 6:40 am

Sample Saturday | Homekeeping Adventures - […] Huevos Rancheros in Tortilla Cups – Big Man loves Huevos Rancheros, and I like how this recipe from The Curvy Carrot makes cute individual servings. I plan to try it out soon. […]

June 2, 2012 - 12:51 pm

Kelsey - I tend to have those things around, as well. Thanks for sharing this great idea!

June 4, 2012 - 4:06 am

Katie - These are super cute! I love huevos rancheros, but I’ve never thought of making them like this. I bet you could use a tray of muffin cups and crank out a whole batch of these for a brunch party. Thanks for the great idea!

June 4, 2012 - 2:13 pm

Sarah from 20something cupcakes - Huevos rancheros is one of my favorite things ever! I’ve been seeing these cups everywhere but not with this filling. Love it! I’ve made huevos into a casserole which is probably my favorite way so far: http://www.20somethingcupcakes.com/2011/12/huevos-rancheros-bake/

June 10, 2012 - 10:05 am

Wake Up « The Incredibly Enthusiastic Girl - […] week I made Root Beer Float cupcakes.  So flipping good and really not that hard. Today, I made Huevos Rancheros in Tortilla Cups. They were really […]

July 9, 2012 - 9:50 am

Huevos Rancheros in Tortilla Cups | Totally Love It - […] yet? This huevos rancheros will light up your day in a heartbeat! This great recipe comes from The Curvy Carrot and of course has been added to my faves as you can see. Oh it look […]

March 21, 2013 - 12:05 pm

Put an Egg on It! Egg Recipes - […] Huevos Ranchos in Tortilla Cups […]

April 16, 2013 - 6:59 pm

Put an Egg on It! Egg Recipes - […] Huevos Ranchos in Tortilla Cups […]

May 8, 2013 - 8:19 pm

Creative Collections: Mother’s Day Brunch | a project at a time - […] Huevos Rancheros in Tortilla Cups by The Curvy Carrot […]

April 28, 2014 - 8:03 am

25 Mouthwatering Mexican Food Recipes | Cinco de Mayo - […]  Huevos Racheros in Tortilla Cups | The Curvy Carrot […]

April 30, 2014 - 11:12 pm

23 Things To Make With Tortillas Other Than Burritos, Tacos or Enchiladas - […] 5. Huevos Rancheros in Tortilla Cups by The Curvy Carrot. Get the recipe. […]