Spicy Penne Alla Vodka

If you read this blog regularly, you know that I love some spice in my food.  You may also know that I love garlic.

I have gotten a few requests to post a few more pasta recipes.  I kind of avoid pasta.  It’s sort of a love-hate relationship.  If I had a choice between a big plate of pasta and some other sort of dish (mmm…vegetable curry or something along those lines), I will always go with the non-pasta option.  I don’t know why.  But, then, there are these random times where I will crave a big Italian sit-down meal with all the bells and whistles. (Now, if you count macaroni and cheese in the category of pasta-then that’s a different story, of course).

Most recently, this was the dish that I suddenly wanted to make.  I made this a little while ago for my parents.  I made up some nice appetizers (posts to follow), opened a bottle of wine, and then served them this dish, complete with some dessert.  To thank them for being so incredibly wonderful. 🙂

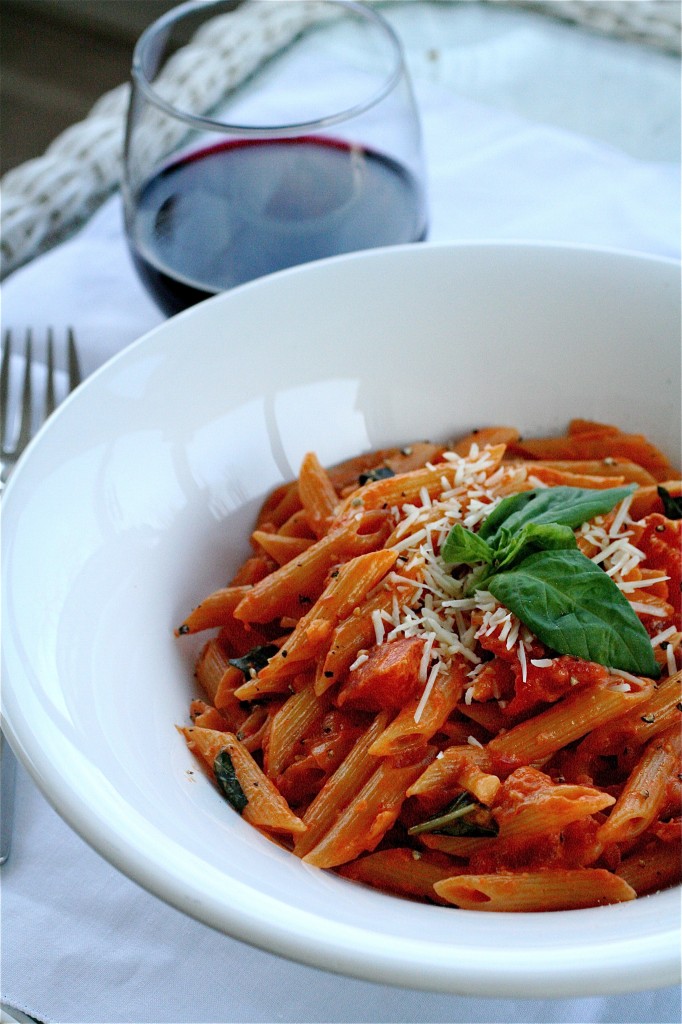
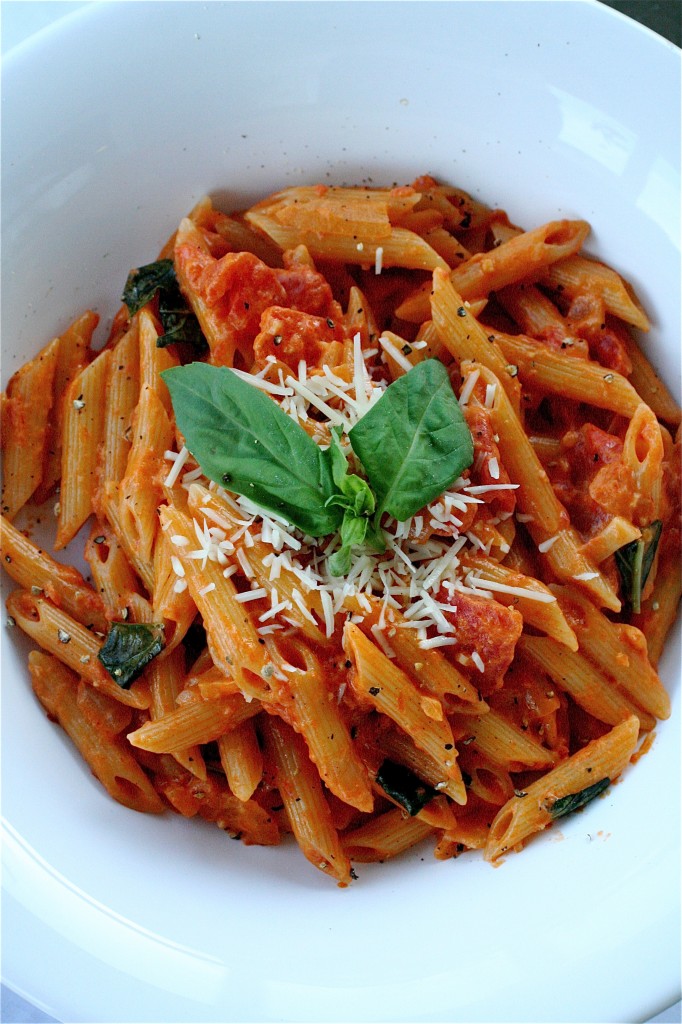
Now, back to my love of spice.  I love the cream base of the penne here, but I thought it could use a little kick to go with it.  So I upped the garlic and the spice, and the results were outstanding!  I was actually quite surprised.  The penne was light and creamy at first, but there was a definite and substantial kick at the end.  I loved this penne so much that I saved the leftovers and immediately heated them up the next night when I came home from work (which is rare for me-the constant left-over avoider….)

Feel free to play around with the spice in this recipe.  The penne is quite forgiving, and I hope you won’t be disappointed.

Spicy Penne Alla Vodka

Servings: 4

Ingredients

1 28-ounce can whole tomatoes, drained, liquid reserved

2 tablespoons olive oil

1/2 small onion, minced

1 tablespoon tomato paste

2 and 1/2 to 3 teaspoons minced garlic (about 3 garlic cloves)

1 teaspoon red pepper flakes (add more for extra spice-I added about 1/2 teaspoon more than this)

At least 1/2 teaspoon salt, plus more to taste

1/3 cup vodka (use that old stuff on the shelf-the quality really doesn’t seem to make a difference)

1/2 cup heavy cream

1 pound penne pasta (I used white, per my father’s request-but next time, I am going for whole wheat pasta)

Handful fresh torn basil leaves

Freshly grated Parmesan cheese

Instructions

1.  For the sauce: Divide your tomatoes into two halves.  Place one half in your food processor or blender to puree.

2. Chop the remaining half into small or bite size pieces and set aside.

3. Combine the pureed tomatoes and the diced tomatoes in a large measuring cup and add enough of the reserved juice to make a total of 2 cups.

4. Heat the olive oil in a large sauté pan over medium heat, until shimmering.

5. Add the onion and the tomato paste and cook, stirring occasionally, until the onions are lightly browned, about 3 minutes.

6. Add the garlic and the red pepper flakes and combine, stirring for another 30 seconds or so.

7. Add the tomatoes and 1/2 teaspoon of salt.

8.  Remove the pan from the heat and pour in the vodka.  Return the pan to the heat and simmer until the alcohol is cooked off and the liquid is reduced, about 8-10 minutes.

(Meanwhile, while the sauce is simmering, fill your large saucepan with enough water for the pasta and place over high heat until it boils.)

9. Stir in the cream and cook until heated through.

10.  For the pasta: At this point, your water should be boiling.  Cook your pasta, according to package directions, until al dente.  Drain your pasta, reserving 1/4 cup of the pasta water. (You may need this later.)

11. Transfer the pasta back to its saucepan and add the tomato sauce.  Stir to coat the pasta evenly. ***If the pasta appears too thick, you can add that pasta water to thin everything out a little.

12. Stir in the basil, and season to taste with salt and pepper.

13.  Garnish with extra fresh basil and Parmesan, if desired.
Adapted from Cook’s Illustrated.

January 28, 2011 - 6:33 am

Annie - Dammit Shanon. I have been trying to avoid penne a la vodka through this pregnancy, and you just went and made it irresistible. Next to a glass of wine, no less. Methinks we will have to make this meal soon after baby girl arrives 🙂 YUM!

January 28, 2011 - 6:34 am

srlacy - I love you!!!

January 28, 2011 - 6:49 am

Blog is the New Black - I really like spicy sauces for a dish like this! Looks great.

January 28, 2011 - 10:27 am

Julia - This looks fantastic!!! 🙂

January 28, 2011 - 5:38 pm

Aku - Mmmmm. I can never get enough garlic in sauces like this. Looks like a great easy meal when nothing but a big bowl of pasta will do 🙂

January 29, 2011 - 10:23 am

sara - YES! I have been looking for a great vodka sauce recipe with lots of spice…I’ll try it soon and let you know what we think 🙂

January 30, 2011 - 6:34 pm

Marjie - Yum! Made this last night. Quickly came together and was much better than the rachel ray recipe I have used for years. thanks!

May 16, 2011 - 4:31 am

Pasta alla Vodka » Annie's Eats - […] Smells Like Home and The Curvy Carrot, originally from Cook’s […]

April 10, 2013 - 12:46 pm

What I Ate Wednesday #2 | Griselda Mood - […] if I don’t eat pasta at least once a week I’ll start twitching. I decided to try out this tasty recipe for vodka sauce and like I said yesterday, it was amazing. So amazing that we  were sad it was all gone and […]

Almond Joy Cheesecake

Oh, my.

I don’t know what it is about this time of year-maybe the gray skies, constant cold, or light snow flurries, but every January I get a craving for something tropical.  Whether it’s exotic fruit, a pina colada, or recipes with abundant coconut, I’m making it.  I also crave things that are not so good for me.  Like this cheesecake, for example.  Now, I am sure that you could substitute low fat cream cheese, omit some of the sugar, skip the chocolate ganache-but, when I make a cheesecake (which is a rare thing), I go all the way.

I’ve been dying to try a candy bar-themed recipe for the longest time.  I’ve got a whole slew of them bookmarked and ready to go.  And, maybe it was the Girl Scout cookie order I just placed (in which I ordered my absolute favorite, the Samoa) that triggered my intense need for a chocolate/coconut combo.  Whatever it was, I loved the idea of taking an Almond Joy (one of my childhood favorites-right down to the blue packaging.) and melding it into a cheesecake form.  Talk about the best of both worlds.

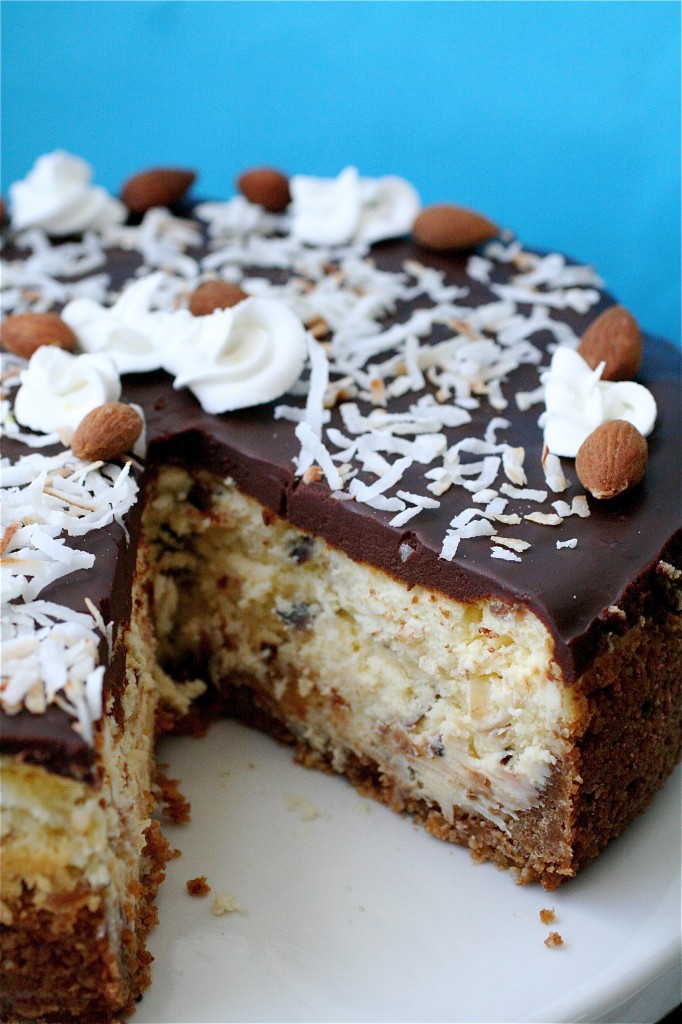
I have to admit, when I make cheesecake, I usually get some of those inevitable cracks.  The good thing about this recipe?  The chocolate ganache creates a smooth covering which hides any of those pesky cracks and makes for a really appealing look.  I’ll let you imagine how it tasted.  Not only does the crust have coconut in it, but the cheesecake itself has toasted coconuts and almonds mixed it.  This is not for the faint-hearted, my friends.

Almond Joy Cheesecake

Servings: depends on how many slices you make!

Ingredients

For the crust:

1 and 1/2 cups graham cracker crumbs (I used cinnamon-flavored.  Weird, I know, but it totally worked and saved me a trip to the store)

1 and 1/2 cups sweetened flaked coconut, toasted

1/2 cup sliced almonds, toasted

1/4 cup sugar

1/2 cup (1 stick) unsalted butter, melted

For the filling:

4 8-ounce packages of cream cheese, at room temperature

1 cup sugar

4 large eggs

1 cup sweetened flaked coconut, toasted

1 tablespoon coconut extract

1 cup sliced almonds, toasted

For the glaze:

1 cup semisweet chocolate chips

3/4 cup heavy cream

1 and 1/2 teaspoons vanilla extract

Whole roasted almonds, toasted coconut, whipped cream, for garnish

Instructions

1. For the crust: Preheat the oven to 350 degrees.

2. Prepare your springform pan by wrapping it with aluminum foil to allow for extra three inches or so of foil to project above the sides.  (This will help later when you need to grab the pan.)

3. In a food processor, pulse the graham crackers, almonds, coconut, and sugar to a fine crumb.

4. With the machine running, slowly add the melted butter and pulse until it resembles moist sand.

5. Press the mixture into the bottom and 1-inch up the sides of the pan.

6. Bake the crust for about 12 minutes, or until set and lightly browned.

7. Remove from the oven and let cool.

8.  Readjust oven temperature to 325 degrees.

9. For the filling: In a standing mixer fitted with the paddle attachment, beat the cream cheese and sugar until smooth.

10.  Add the eggs, one at a time, mixing well after each addition.

11. Add the coconut and coconut extract.

12.  Stop the mixer, and gently fold in the toasted almonds with a spatula until well combined.

13. Transfer the filling to the cooled crust and bake for about 1 hour and 15 minutes (until the crust is puffy and lightly browned).

14. Remove the cheesecake from the oven and let cool completely on a wire rack.

15. For the chocolate glaze: Combine the chocolate chips, cream, and vanilla in a small saucepan over medium heat, stirring frequently until smooth.

16.  Remove the pan from the heat and let cool to room temperature (this took about 10 minutes for me).

17. Pour the glaze over the cheesecake (which is still in the springform pan) and spread evenly.

18.  Chill the cheesecake overnight or until firm and set.

19.  When ready to serve, run a knife around the perimeter of the pan to loosen the cake.  Release the pan sides and serve.

Source:  Bon Appétit, February 1998.

January 26, 2011 - 8:20 am

Sara - OMG. This looks amazing and I LOVE Almond Joys and Samoas – must run in our blood! 😉

January 26, 2011 - 9:49 am

Kim-Liv Life - Funny, I’m not an Almond Joy fan, but I’d take this cheesecake in a heartbeat!! I’m with you on the tropical part…. my dinner and dessert plans have been heading that direction too lately! Love this one, it’s most definitely bookmarked.
Your photo is simply gorgeous! Nicely done

January 26, 2011 - 10:42 am

Jessica - Coconut + chocolate + cheesecake…? I think might die just thinking about it. Yum!

…and interestingly enough you’re the second blogger I read to post a cheesecake recipe with chocolate ganache in the last two days. 😛

January 26, 2011 - 11:29 am

Eat Good 4 Life - Very cool looking cake and I bet it tastes as good as it looks!

January 26, 2011 - 12:23 pm

Shawn - This looks soooo good! I love coconut and chocolate!

January 26, 2011 - 2:22 pm

Christina - These pictures are incredible. It’s such a pretty cheesecake! Although I know it’s not enough to resist taking a bite. 🙂

January 26, 2011 - 3:49 pm

natalie (the sweets life) - oh my!!!!!! I just made homemade samoa bars and they were incredible. love coconut! Can’t wait to make this next time I need a decadent dessert!

January 26, 2011 - 5:33 pm

Fresh and Foodie - Delicious! I love the way the chocolate glaze looks on the top. Can I have a slice right now? 🙂

January 26, 2011 - 8:13 pm

Dorothy at Belle of the Kitchen - This looks gorgeous and is one of my husband’s favorite combinations (okay, I’m pretty partial to almonds and coconut, too)! My only regret is that my springform pan is in storage, hundreds of miles away.

January 26, 2011 - 8:24 pm

Angela - OHHH MY… it looks like an orgasim in your mouth on a plate. OMG! I want to make this!

January 26, 2011 - 9:33 pm

JehanP - Wow, I will not even try this recipe unless I’m having a party because I will eat the entire pan!

January 26, 2011 - 9:51 pm

Claire - This is just one of those dishes that seems like a perfect dinner for a Friday night after a long week. 🙂 Have you tried homemade samoas? They are pretty darn evil.

January 26, 2011 - 10:17 pm

melissa @IWasBornToCook - oh, my is RIGHT! WOW!

January 26, 2011 - 11:30 pm

Kat @ Cupcake Kat - Oh my gosh this cheesecake looks amazing!

January 27, 2011 - 12:06 am

Kerry - All I know is that I love Almond Joy, I love cheesecake, & I could pretty much eat your pictures right now. That looks amazing!!!

January 27, 2011 - 10:18 am

Patty - YUM!

January 27, 2011 - 9:11 pm

fabjems - I cannot wait to make this! I always want to pickup an Almond Joy candybar everytime I’m at the grocery store cashier section (where all the candies are). Have so many desserts on my baking list – this will be on top.
Thanks!

January 28, 2011 - 10:41 am

Kelsey - Oh my. This looks absolutely incredible!

February 2, 2011 - 10:57 am

Tanja - It looks delicious! It’s going on my to-bake list.

February 11, 2011 - 4:15 pm

happy friday | - […] photo/recipe from The Curvy Carrot […]

February 12, 2011 - 9:31 pm

Sophistimom - I love Almond Joy, but I am convinced I would love this better.

Yum.

March 3, 2011 - 9:06 am

Rather Be Baking « birthday cake - […] Almond Joy Cheesecake Adapted from The Curvy Carrot […]

June 28, 2011 - 2:58 pm

Kate - What size springform pan did you use??? I have an 8, 9, and 10 inch!

June 28, 2011 - 4:01 pm

srlacy - HI Kate-

I used an 8-inch springform pan. I wish I had three different sizes, though. 🙂 You are a lucky lady!

July 12, 2011 - 9:19 pm

Gayla - DID ANYONE EVER MAKE THIS MONSTER? And…what’s it taste like. We have all the “yums” on how it looks & what it could taste like. Inquiring minds want to know. Thanks to all.

July 25, 2011 - 1:22 pm

Cheesecake Recipe Collection – Bites From Other Blogs - […] Almond Joy Cheesecake From The Curvy Carrot […]

November 22, 2011 - 3:13 pm

Kimberly - Oh – My – God! The only description this needs…

November 28, 2011 - 7:14 pm

Bolanle - I made this cheesecake for thanksgiving. Absolutely awesome, easy to make, a joy to eat and a real hit at the table. Was worth the try.

Very rich and decadent taste….thank you for this recipe as i am a huge almond joy fan.

January 29, 2012 - 6:20 pm

Mandy - Made this — delicious but the recipe omits mention of when to add the coconut to the filling. I folded it in with the almonds?? Either way — great recipe thanks for posting!

January 29, 2012 - 6:24 pm

srlacy - Hi Mandy!

THANK YOU so much for catching that. I have updated and corrected the recipe. Glad it turned out for you!

March 17, 2012 - 11:07 pm

angela - I just made this for a church auction fundraiser…hadn’t even the chance to taste it but it looked so delicious and perfect…it actually sold for 110 dollars!! I’ll have to make it again very soon for myself. 🙂

April 3, 2012 - 8:31 am

spiceblogger - This looks DIVINE! And I’m not even a cheesecake fan. But I would eat this! lol
pinning this so I can make it later….

–shelley

June 24, 2012 - 10:04 pm

Almond Joy Cheesecake « Viajes - […] From the Curvy Carrot […]

July 7, 2012 - 6:59 am

Margie - I live in Australia and I am curious as to what an ‘almond joy’ is? Can someone please tell me. Nevertheless I’ll certainly be making this cheesecake 🙂

July 13, 2012 - 5:37 pm

Tracy - http://www.hersheys.com/almondjoy-mounds.aspx

Almond joy is a candy bar in the US…a most delicious candy bar

October 15, 2012 - 9:00 am

24 Best Cheesecake Recipes for Entertaining - Food and Family - […] 13. Cinnamon Roll Cheesecake with Cream Cheese Icing 14. Chocolate Peanut Butter 15. Ferrero Rocher Cheesecake 16. Almond Joy Cheesecake […]

November 7, 2012 - 11:37 pm

Debbie D - This looks so good, I love coconut, hopefully it is not too over powering, My question to you is what size spring form pan did you use?
Also when I make a cheese cake I never use foil is this a must? We really like a reply soon, I would love to make it this week.
Thanks

November 8, 2012 - 1:07 pm

srlacy - Hi Debbie-

I am pretty sure I used a standard 9″ springform pan. Since I used the foil, I can’t tell you whether or not using it will work. If you choose not to use it, just watch your cake very carefully. Good Luck!

November 9, 2012 - 9:26 pm

Alanna - Hi – Do you use a water bath when you bake it? You don’t mention it, but I guess I’ve never heard of a cheesecake baked without it, so I thought I’d ask.

November 10, 2012 - 10:49 am

srlacy - Hi Alanna-
It’s been a really long time (waaaayyy too long-sooo good) since I have made this, but if I didn’t comment on it, I am 98% sure that I didn’t use one. Feel free to check the original source at the end of the post to compare. Good luck!

November 15, 2012 - 8:29 pm

Catherine Paciotti - I used oreos without the filling for the crust (without the almonds and coconut). Couldn’t find coconut extract, used imitation coconut flavoring, but only 1 1/2 tsps. in the filling. Didn’t use sliced almonds, used whole almonds chopped and toasted 8 minutes at 350 for the filling and whole almonds toasted to decorate the ganache. Was such a DELICIOUS cheesecake!

November 15, 2012 - 8:32 pm

Catherine Paciotti - Oh, I didn’t use foil and it dripped some butter from the crust, so I slipped a cookie sheet under it halfway through. It was fine. It rose above the 9″ springform pan and I was afraid there might not be room for the ganache, but as it cooled, it shrunk back down. There was barely even a crack in it! I was surprised! I’ve made a lot of cheesecakes and usually they have a big crack. Great recipe!

November 18, 2012 - 9:18 am

Fanny - I’m making it for Thanksgiving can you tell me What size pan? Thanks

November 18, 2012 - 10:57 am

srlacy - Hi Fanny-
I used a standard 9-inch springform pan.

January 3, 2013 - 9:56 am

Carole Anne Del Vecchio - I made this for Christmas, my family LOVED it!
Simple to make, superb outcome!
If you love Almond Joy candy, this one’s for you!

March 18, 2013 - 12:59 pm

Amy - I made this and it was delicious! Everyone loved it! Only problem was I had butter drip out of bottom of the springform pan, I have never had that happen before. It was also too much for my little 8in. pan, so I made little cheesecakes in my muffin pan with the extra filling. The kids really liked eating the little ones.

May 2, 2013 - 8:04 pm

Almond Joy Cheesecake | Dreamy Blog - […] This is another excellent dish in the making! Look how artistically and skillfully this is done! The author must be very genius! How did he make this look so mouthwatering?! I can’t wait to indulge myself into this scrumptious dish! Look so creamy, so juicy and tender…so soft to munch! Oh my palate would love that!Credits to the source […]

May 2, 2013 - 9:21 pm

80 Cheesecake Recipes - Something Swanky - […] Almond Joy Cheesecake […]

May 4, 2013 - 2:20 pm

Cathy - OMG! This looks amazing!

I would love for you to link up to my TGIF Link Party! Who knows, you just might be featured next week!

http://apeekintomyparadise.blogspot.com/2013/05/a-peek-into-my-paradise-tgif-link-party.html

Cathy

June 27, 2013 - 5:29 pm

Treat Your Taste Buds to My Favorite Dessert Recipes - […] Almond Joy Cheesecake – Get The recipe –>> The Curvy Carrot […]

July 30, 2013 - 1:11 am

National Cheesecake Day! | Daily Holiday Blog - […] Almond Joy Cheesecake by The Curvy Carrot […]

September 27, 2013 - 5:24 pm

15 Yummy Cheesecakes Recipes - […] Recipe and Photos credit to thecurvycarrot.com […]

October 10, 2013 - 2:02 pm

Marsha - Maybe ppl aren’t as “kitchen challenged” as I am, but when it says to wrap the springform pan in aluminum foil, I think it’s supposed to be the outside of the pan, not the inside, like I just did. LOL. I am not sure how I will get it out of the pan, but I know it will be good, regardless.

October 25, 2013 - 12:32 pm
November 10, 2013 - 9:01 am

Top 10 Tempting Cheesecakes - Top Inspired - […] Recipe and Photo credit to thecurvycarrot.com […]

November 20, 2013 - 11:37 am

ALMOND.JOY.CHEESECAKE | Subordinate - […] main thing is, you have to start early – like the day before early.  I got the recipe from here, but I’ll include it in this post for you and save your web browser the […]

December 1, 2013 - 5:01 am

Elizabeth - I can’t attest to the cheesecake yet but I sampled the ganache before I put it on and I’m super glad that I did. It had way too strong of an aftertaste of vanilla. I was surprised it included that much vanilla in the first place since I’ve made ganache before and never put in that amount, if any. I would definitely advise tasting it before you put it on. To me it tasted like cough syrup. I don’t know if I let it set if that would make a difference but I’m serving this at a family Thanksgiving and I’m not willing to risk it.

January 20, 2014 - 11:14 am

Almond Coconut Cheesecake - Creations by Kara - […] Recipe adapted from The Curvy Carrot […]

March 13, 2014 - 3:09 pm

hannah - these are so amazing I could cry this is the most awesomess web site ever

April 17, 2014 - 3:24 pm

Almond Joy Cheesecake | Food WoW - […] Go to full Instructions […]

May 10, 2014 - 8:58 am

Michelle M - I made the Almond Joy cheesecake as I am a big coconut fan and love almond joys and I have to tell you this came out so amazing. Everyone just loved it and it is now my favorite cheesecake to make. Thank you so much for sharing.

June 16, 2014 - 6:18 pm

Almond Joy Cheesecake | Link4Food - […] Linked from: www.thecurvycarrot.com […]

June 21, 2014 - 2:21 pm

Delicious Cheesecake Recipes! - Songbirds and Buttons - […] Almond Joy Cheesecake / The Curvy Carrot […]

July 29, 2014 - 7:02 am

Cheesecake Recipes Galore {A Round Up of 50 Varieties} - To the Moon and Back - […] Creme Brulee Cheesecake from Will Cook for Smiles Banana Split Cheesecake from Inside BruCrew Life Almond Joy Cheesecake from The Curvy Carrot Sweet Potato Swirled Cheesecake with Pecan Crust from Fifteen Spatulas Baked […]

September 6, 2014 - 11:47 am

Dawn - Are you sure the glaze takes 3/4 cup heavy cream? I made it that way but it was too runny. More like a syrup so I remade with 1/4 cup heavy cream. Seems thicker.

November 16, 2014 - 7:45 pm

Kelly - Made this tonight for the hubby’s birthday. Amazingly rich and delicious!

Poppy Seed and Sea Salt Crackers

I never had even thought about making my own homemade crackers before.  It was like an epiphany when I found this recipe and realized how simple and straight forward making crackers can be. Now I can tailor the spices and seasonings to my own liking, avoid scary chemicals and additives, and make whatever shape I want.

These crackers are absolutely addicting.  They are light and fluffy, and the hint of sea salt is just enough to give them a little something special.  I used a small cookie cutter I had on hand to cut them from the rolled dough, but you could use just about any shape.  You could also substitute any kind of seed for the poppy seeds if you desire: sesame, caraway, or even celery seeds.   The possibilities are endless.

Congratulations, you now know how to make your own delicious crackers.

Poppy Seed and Sea Salt Crackers

Servings: 20 small crackers

Ingredients

1 cup all-purpose flour

1 teaspoon salt

1 teaspoon superfine sugar (if you don’t have this, just pulse some regular sugar in a food processor a few times)

1 tablespoon unsalted butter, room temperature

1 tablespoon poppy seeds

6-7 tablespoons heavy cream, plus more for brushing the tops of the crackers

Sea salt flakes

Instructions

1. Preheat the oven to 300 degrees.

2.  Put the flour, salt, and sugar in a bowl and rub in the butter with your fingers to form a coarse dough.

3.  Stir in the poppy seeds.

4.  Add enough cream to mix to a stiff dough (I ended up using 7 tablespoons)

5. Roll the dough out on a lightly floured surface to a thickness of about 1/2-inch.

6.  Cut the dough into the desired shapes using a cookie cutter.

7. Place the dough on an ungreased baking sheet and brush sparingly with the cream.

8.  Sprinkle a few sea salt flakes over each cracker.

9.  Bake in the oven for 30 minutes until crisp but still pale.

10.  Transfer to a wire rack to cool.

Adapted from The Cookie and Biscuit Bible.

January 24, 2011 - 5:40 am

Blog is the New Black - These crackers soun wonderful!

January 24, 2011 - 6:34 am

Aku - I dunno why I wasn’t convinced when I read the title of this post but seeing your pictures of those salty little pillows has totally changed my mind–these look great as always Shanon 🙂

January 24, 2011 - 8:49 am

Rachel - I’ve never thought about making my own crackers before either! I bet these are addicting, as you say, and I know my fiance and I would devour them in no time.

January 24, 2011 - 10:47 am

Jara - These crackers look so cute and delicious. I can just imagine the taste with the poppy seeds and salt. I’ve never considered making my own crackers as well esp with the amount that I buy. I’ll definitely have to consider making it. How long do you think these could keep?
🙂

January 24, 2011 - 11:25 am

srlacy - Jara-
If kept in a tight-lidded container, they should be good for about a week. Mine didn’t last that long, though. I was addicted. 🙂

January 24, 2011 - 12:59 pm

Patty - I love homemade crackers. Once I started making them, I was surprised at how easy and versatile they were – yours sound wonderful! I’ve been craving poppy seeds too, but haven’t seen any in Mexico… maybe because they’re nefarious seeds. 😉

January 24, 2011 - 2:50 pm

natalie (the sweets life) - i absolutely love making homemade crackers! I’ve actually made these before and we loved them…but recently I made some cheddar sage ones (not on the blog yet) that were my all-time favorite!

January 24, 2011 - 2:52 pm

srlacy - OOOhhh! Those sound awesome! I can’t wait to see them on your blog, Natalie!