Caramel Apples

It wouldn’t be Fall without these treats, would it?  I absolutely love caramel apples, and, sadly enough, this was only my second time making them.  I think my first experience was when I was 12, and I made them with the pre-packaged individually wrapped caramels.  But now that I’m officially a grown-up (birthday is tomorrow……), I wanted to make my caramel from scratch, over a stove, and decorate with a more “sophisticated” look.

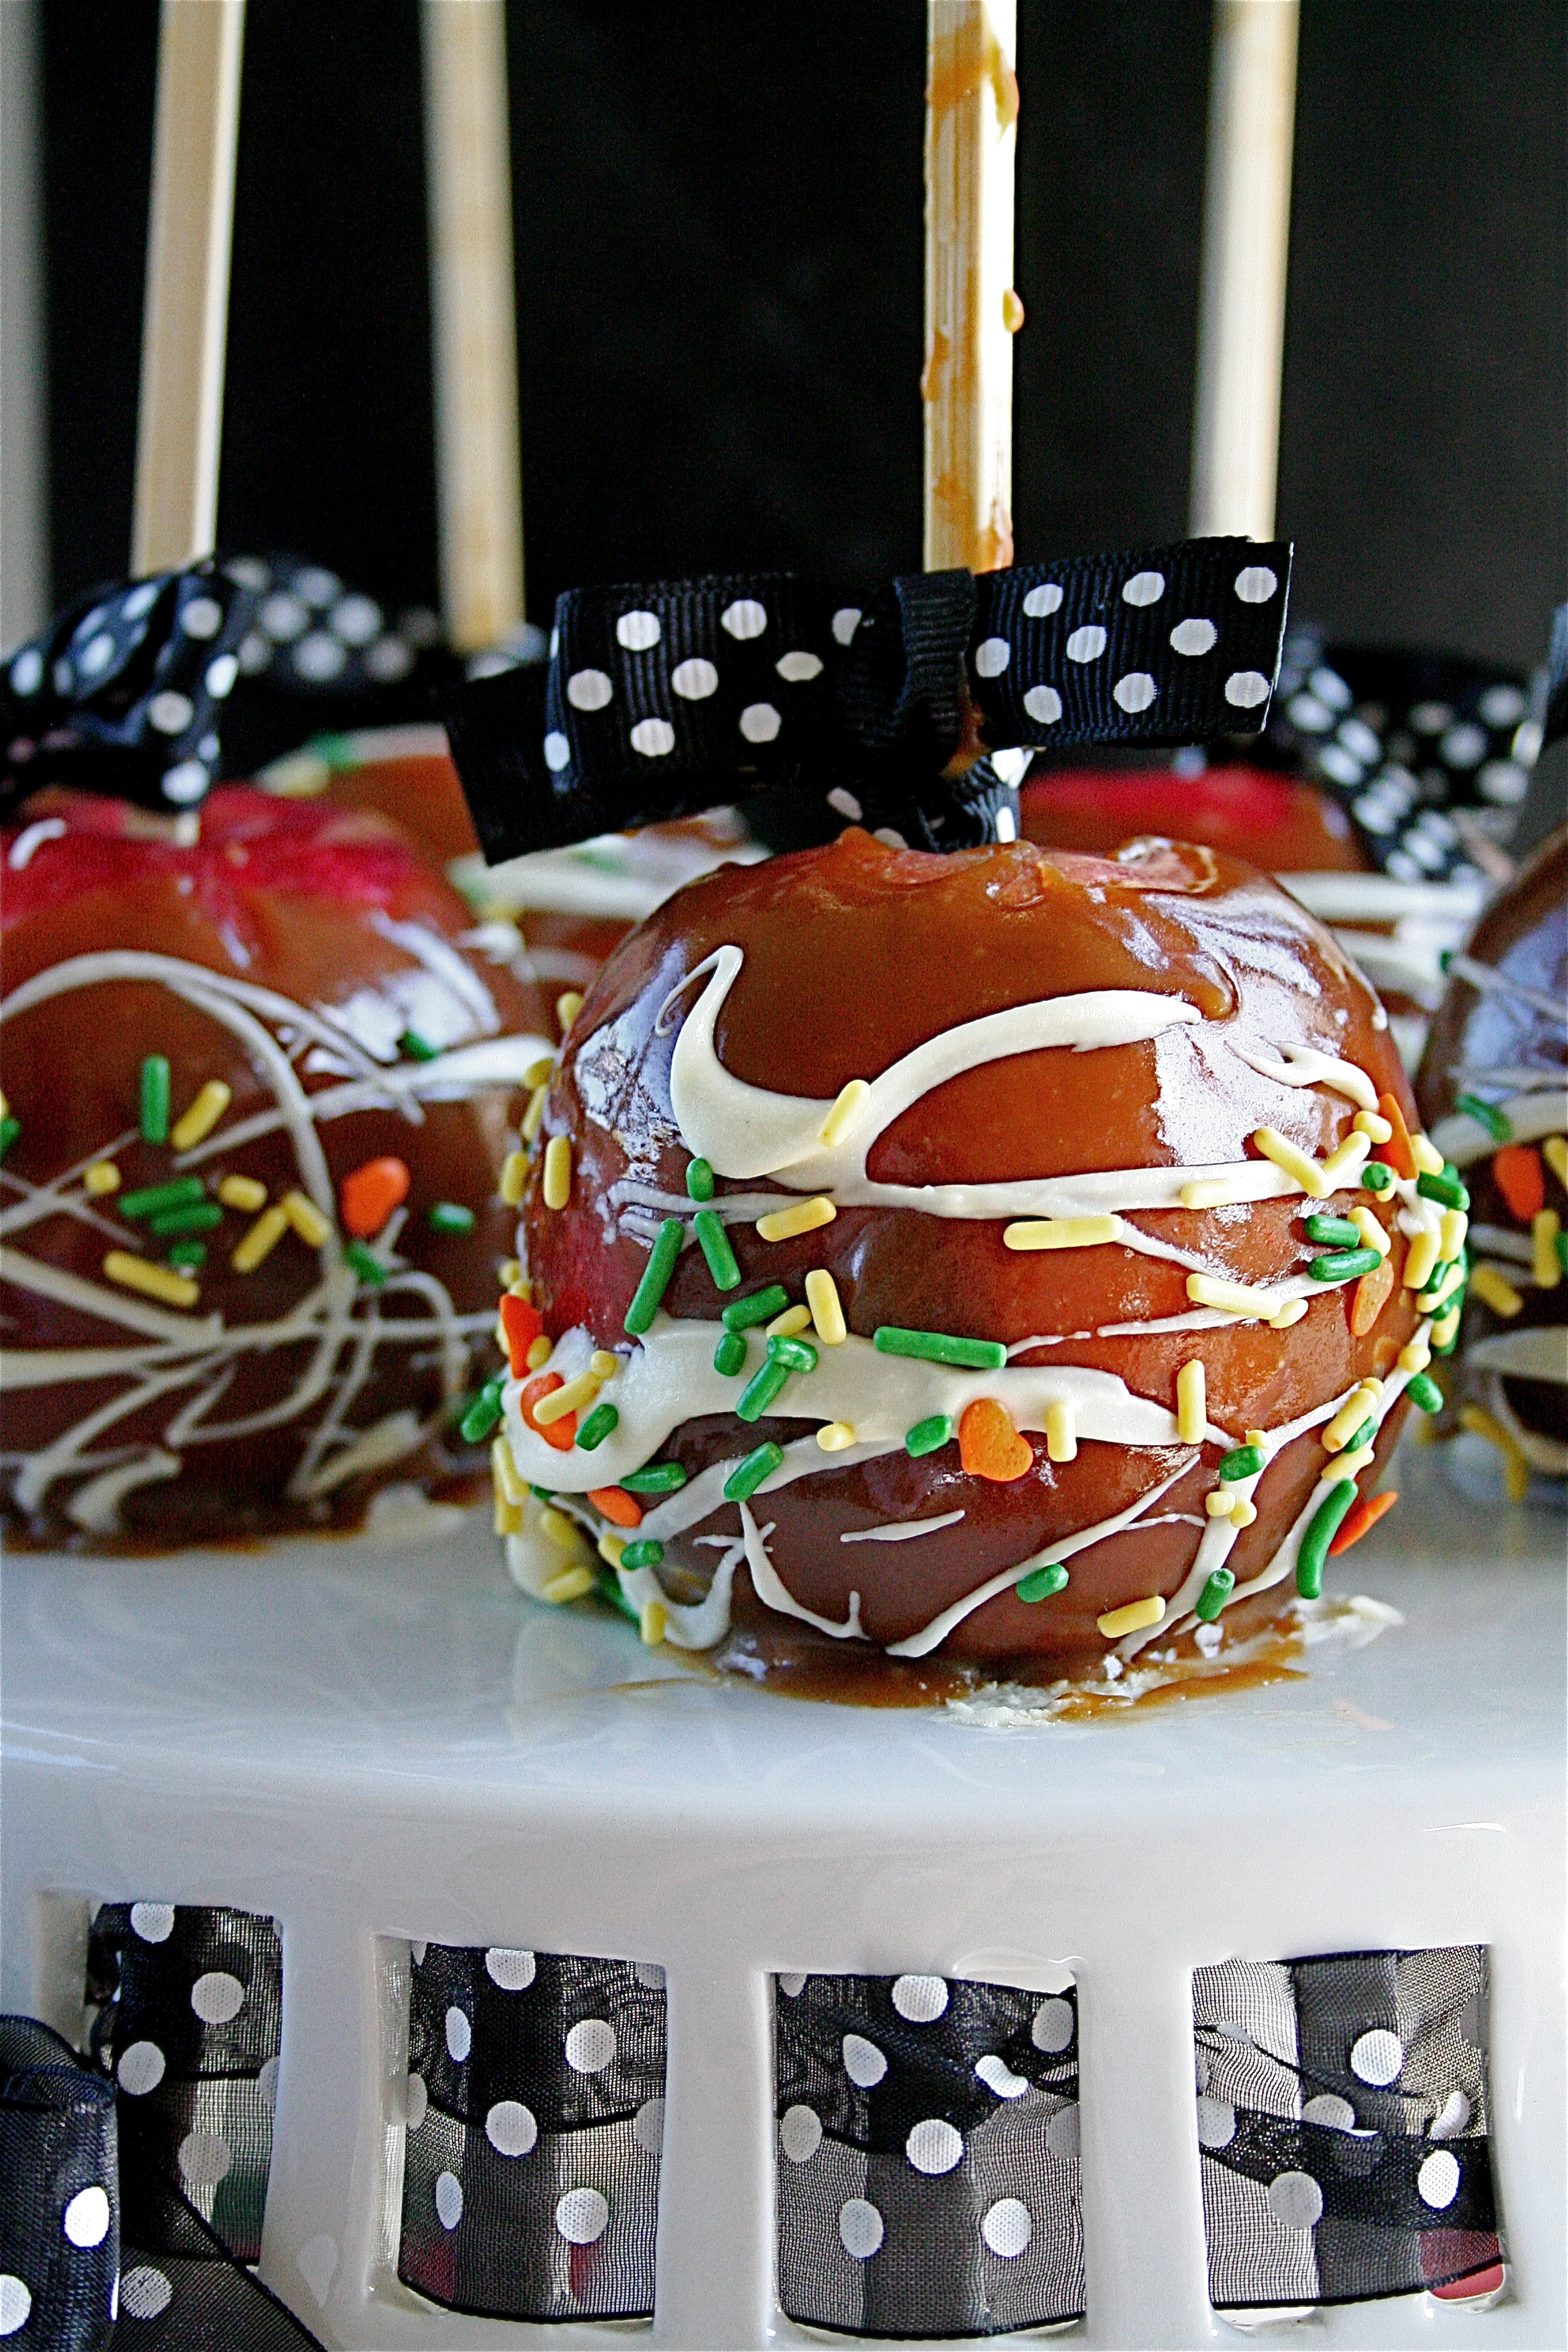
I’ll be honest with you. I got pretty frustrated while making these.  For some reason, my caramel wasn’t setting right, and my apples were drippy and unevenly dipped.  I even rigged a special stand (a shower caddy on its side because it had holes in it through which I could slide the chopsticks for the apples to set and harden), but that didn’t seem to work.  I finally just turned them upside down on a baking sheet and put them in the refrigerator for about a half hour to harden, which seemed to do the trick, until I actually burned the semisweet chocolate chips that I was going to so beautifully drizzle over the set caramel.  I mean, seriously, who burns semisweet chocolate chips in the microwave?  *This girl*.  I was near waving the white flag and ditching the whole idea when I decided to just use the white chocolate chips (which I magically did not burn) and the sprinkles that my boss had given me one day.

And then I tied them with polka dot ribbons, and that seemed to make it all better.


Caramel Apples

Servings: 6

Ingredients

Chopsticks

6 apples, your choice of type (I used Michigan Empires)

1 1-pound box of dark brown sugar

16 tablespoons unsalted butter, room temperature, plus extra for buttering foil

1 14-ounce can sweetened condensed milk

2/3 cup dark corn syrup

1/3 cup pure maple syrup

1 and 1/2 teaspoons vanilla extract

1 teaspoon robust-flavored (dark) molasses

1/4 teaspoon salt

1 cup white chocolate chips (mmmmm Ghiradelli)

Sprinkles, or other desired garnishes


Instructions


1.  Combine brown sugar, butter, condensed milk, corn syrup, maple syrup, vanilla, molasses, and salt in a heavy 2 and 1/2-quart saucepan.

2.  Stir with a wooden spoon or spatula over medium-low heat until sugar dissolves, occasionally brushing down sides of pan with a wet pastry brush, about 15 minutes.

3.  Attach a clip-on candy thermometer to side of pan.

4.  Increase heat to medium-high, cook caramel at rolling boil until thermometer reads 236 degrees, stirring constantly but slowly with a clean wooden spoon or spatula and occasionally brushing down the sides of the pan with a wet pastry brush, about 12 minutes.

5.  Pour caramel into a metal bowl (do not scrape pan).

6.  Submerge thermometer bulb in caramel; cool, without stirring until thermometer reads 200 degrees, about 20 minutes.

7.  While caramel cools, line 2 baking sheets with foil.

8.  Butter foil.

9.  Push a chopstick into the stem end of each apple.

10.  Holding the chopstick, dip one apple into the caramel, submerging all but the very top of the apple.

11. Lift the apple out, allowing excess caramel to drip back into the bowl.

12.  Tur the apple caramel side up and hold for several seconds to help set caramel around apple.

13.  Place coated apple on prepared foil.

14.  Repeat with remaining apples and caramel, spacing apples apart (caramel will pool on foil).

15.  Chill apples on sheets until caramel is partially set, about 15 minutes.

16.  Lift one apple from foil.  Using hand, press pooled caramel around apple; return to foil.  Repeat with remaining apples.

17. Melt the white chocolate (or semisweet, whatever you are using), in the microwave at 30 second increments until fully melted.

18.  Drizzle chocolate over caramel-coated apples and decorate with sprinkles, if using.

19.  Chill until decorations are set, about 1 hour.  Cover; chill up to 1 week.


Source:  Bon Appetit, October 1999.

Pumpkin Cranberry Walnut Bread

Ah, the days of Fall are upon us, it seems.  The leaves have suddenly changed color and are falling from the trees, the wind has a chill in it, and there are Halloween decorations everywhere.  It’s my favorite time of year.

And this equals pumpkin recipes.

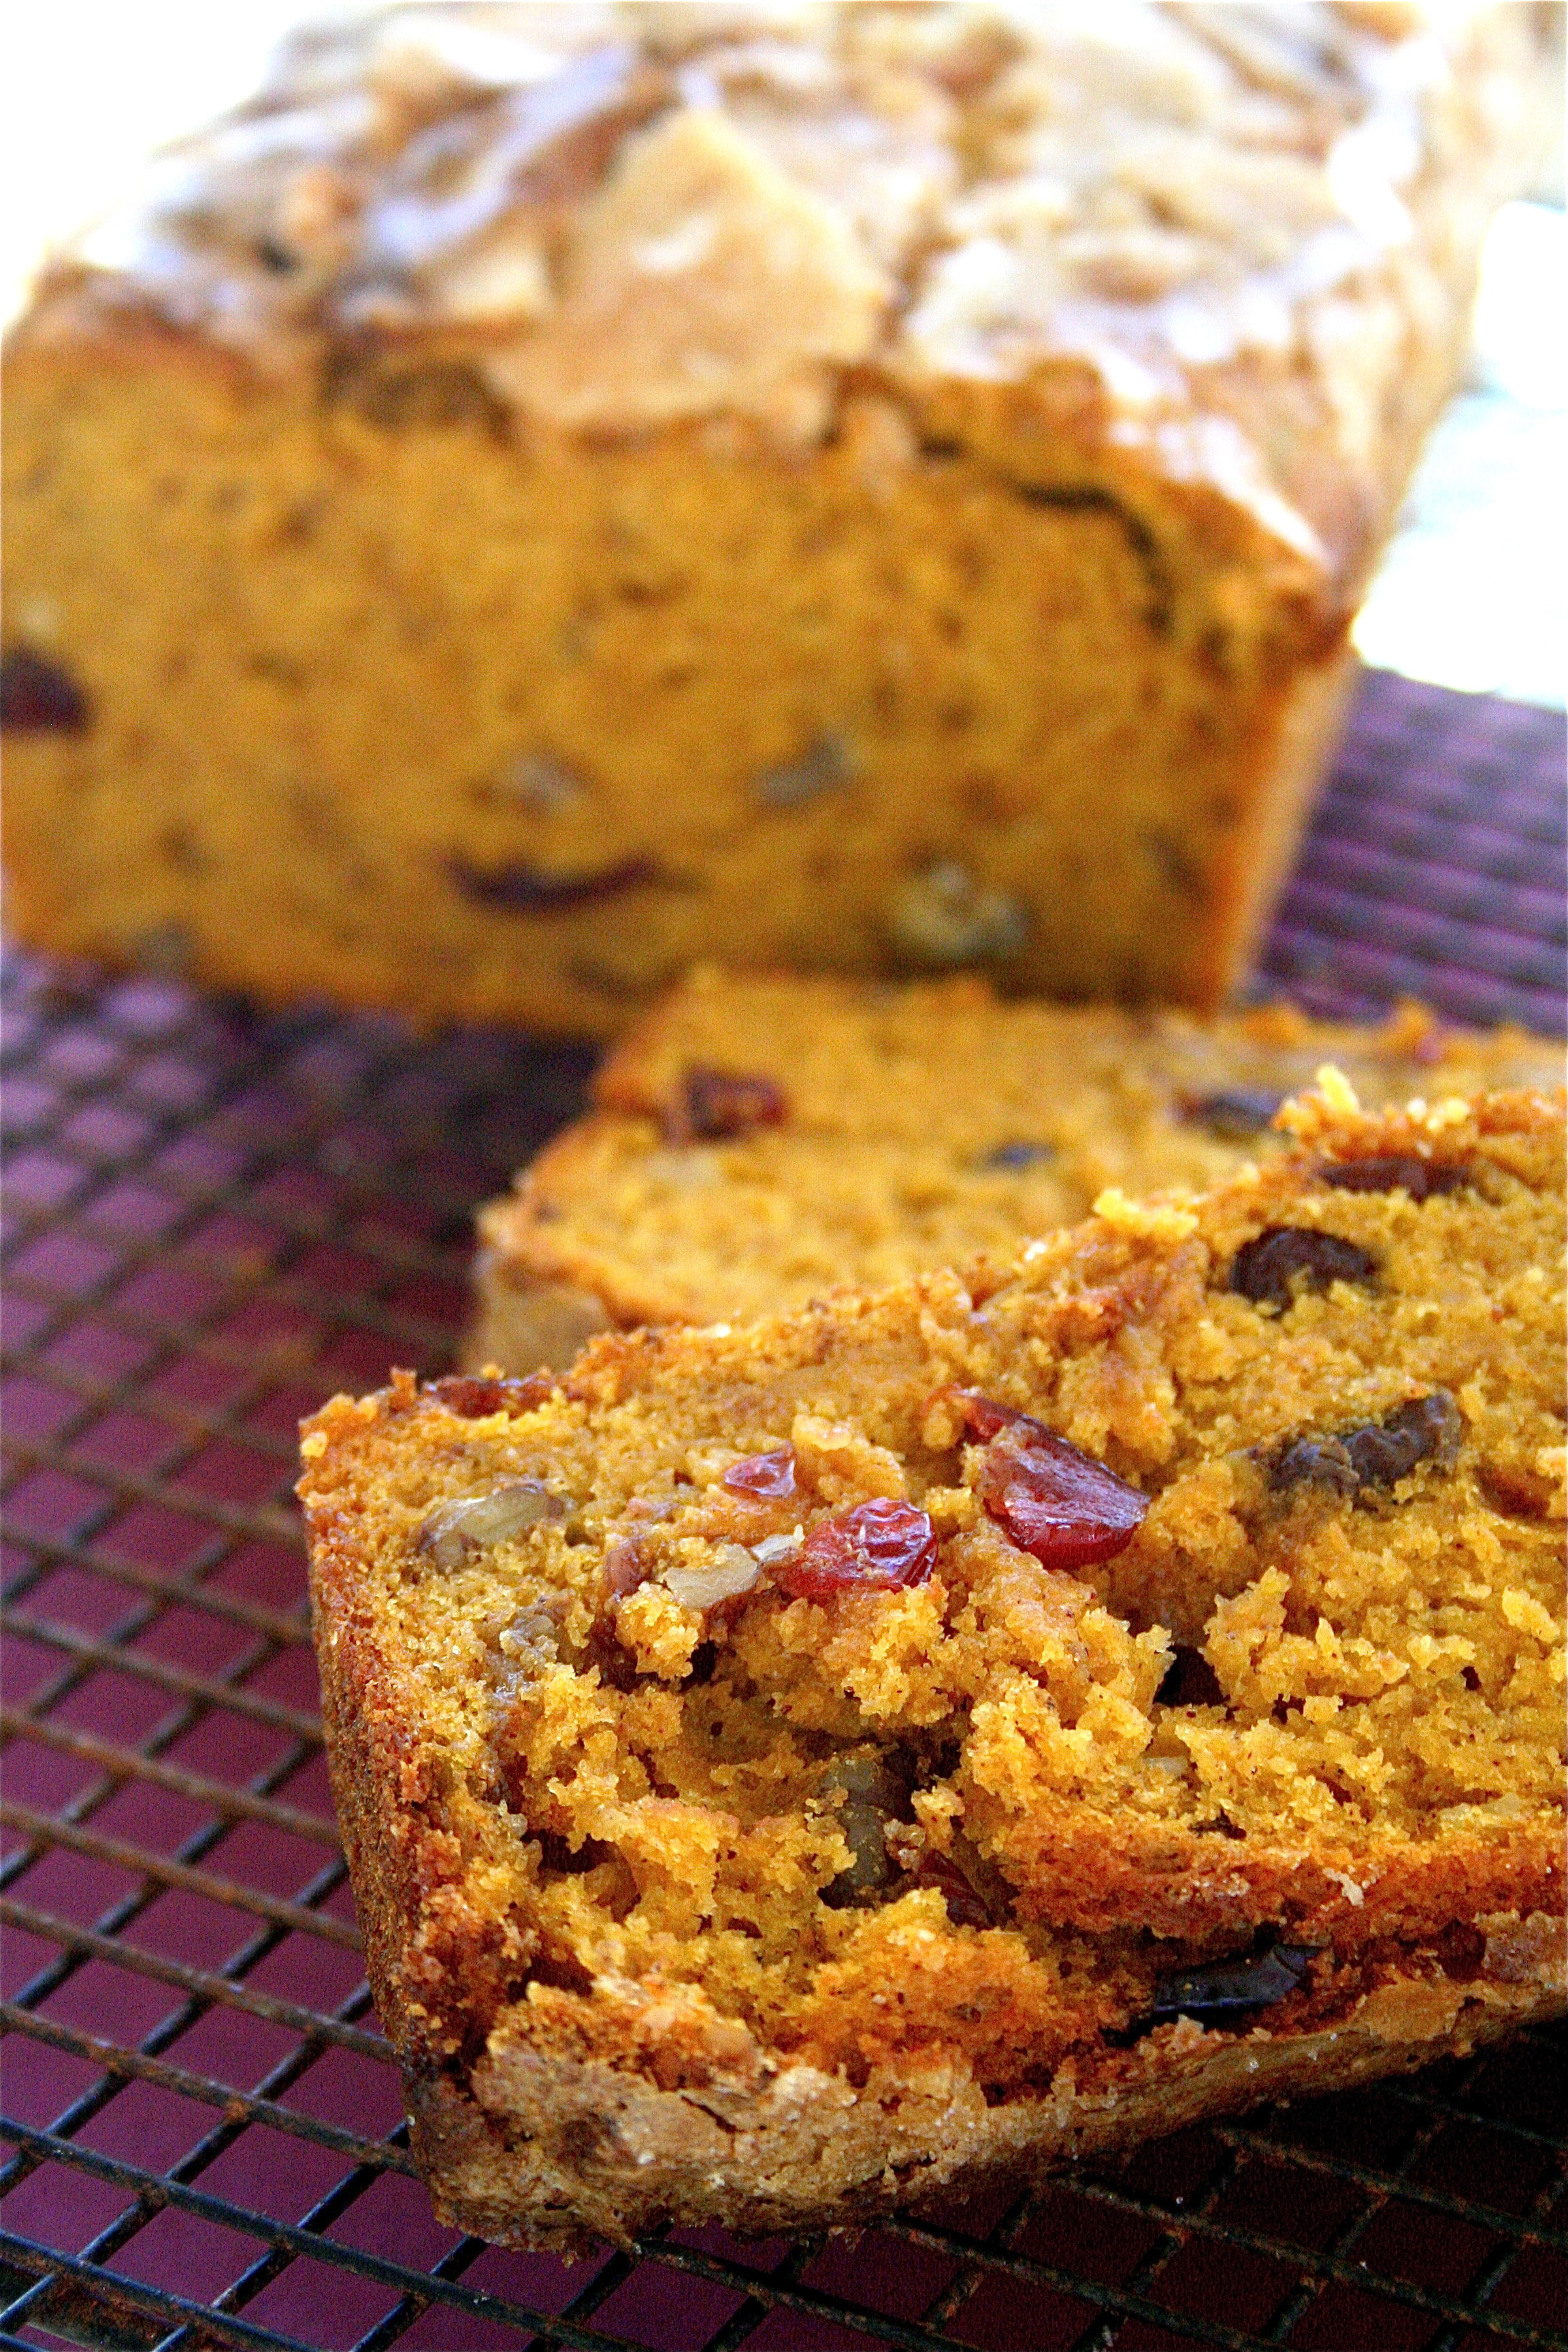
I made this bread, attracted to the addition of cranberries (sweet) and walnuts (good for you) over a plain old pumpkin bread (which is also delicious, but I’m branching out here….).  I was not disappointed.  I added extra sugar on the top before I baked it, and this made a crunchy, almost caramelized topping to the bread (bonus).  The bread is moist, flavorful, and the bits of cranberries and walnuts really add something special.

Have a wonderful Fall weekend.  🙂

Pumpkin Cranberry Walnut Bread

Yield: 1 loaf

Ingredients:

2 cups all-purpose flour

2 teaspoons pumpkin pie spice

1 teaspoon baking powder

3/4 teaspoon salt

1/2 teaspoon baking soda

6 tablespoons (3/4 stick) unsalted butter, softened

1 cup, plus 1/3 cup sugar

2 large eggs

1 cup canned pure pumpkin

1 teaspoon vanilla extract

2/3 cup buttermilk

1/2 cup dried sweetened cranberries

1/2 cup coarsely chopped walnuts

Instructions

1.  Preheat oven to 350 degrees.

2. Butter a loaf pan (regular size) and line the bottom and two long sides with parchment paper.

3.  Whisk flour, pumpkin pie spice, baking powder, salt, and baking soda in a medium bowl, set aside.

4.  In your mixing bowl, beat the butter until fluffy.  Gradually add 1 cup of the sugar and beat until blended.

5. Beat in eggs, one at a time.

6. Beat in pumpkin, then vanilla.

7.  Beat in dry ingredients alternately with buttermilk in 2 additions each.

8.  Fold in cranberries and walnuts.

9.  Transfer batter to the loaf pan, and sprinkle with the remaining 1/3 cup of sugar.

10. Bake until bread is done and a toothpick inserted into the center comes out clean, approximately 1 hour and 10 minutes.

11.  Cool bread on rack for 15 minutes.

12.  Remove bread from loaf pan and cool completely.

Source:  Bon Appetit, October 2003.

October 16, 2010 - 11:41 am

Kori - This looks and sounds delicious! Great idea to combine the pumpkin and cranberries!

October 19, 2010 - 12:46 pm

natalie (the sweets life) - i’ve made similar quick breads that are to die for! such great Fall flavors!

October 20, 2010 - 8:42 pm

Patty - Looks and sounds FANTASTIC. Probably would make awesome muffins too. 🙂

October 25, 2010 - 3:45 pm

Catherine - I just made this for myself and my flat mates. It went down a hit – we ALL tucked in! Amazing!!

Salmon Burgers with Barbeque Hoisin Sauce

I got on another dessert roll, didn’t I?  I’m trying to limit the not-so-healthy posts and instead insert some deliciously-healthy posts.

Let’s be honest.  Sometimes it’s a losing battle.  I’m noticing that since my birthday is next week, I am (for pretty much the entire month of October) using the “well, my birthday is coming up, and I deserve it” excuse.  And, a million cookies and cakes and calorie-laden drinks later….I’m looking for something to relieve a little of the guilt from my trip last week where I definitely over-indulged.  Candy bars, bagels loaded with cream cheese, extra cream in the coffee, free happy hour appetizers in the hotel..yikes.

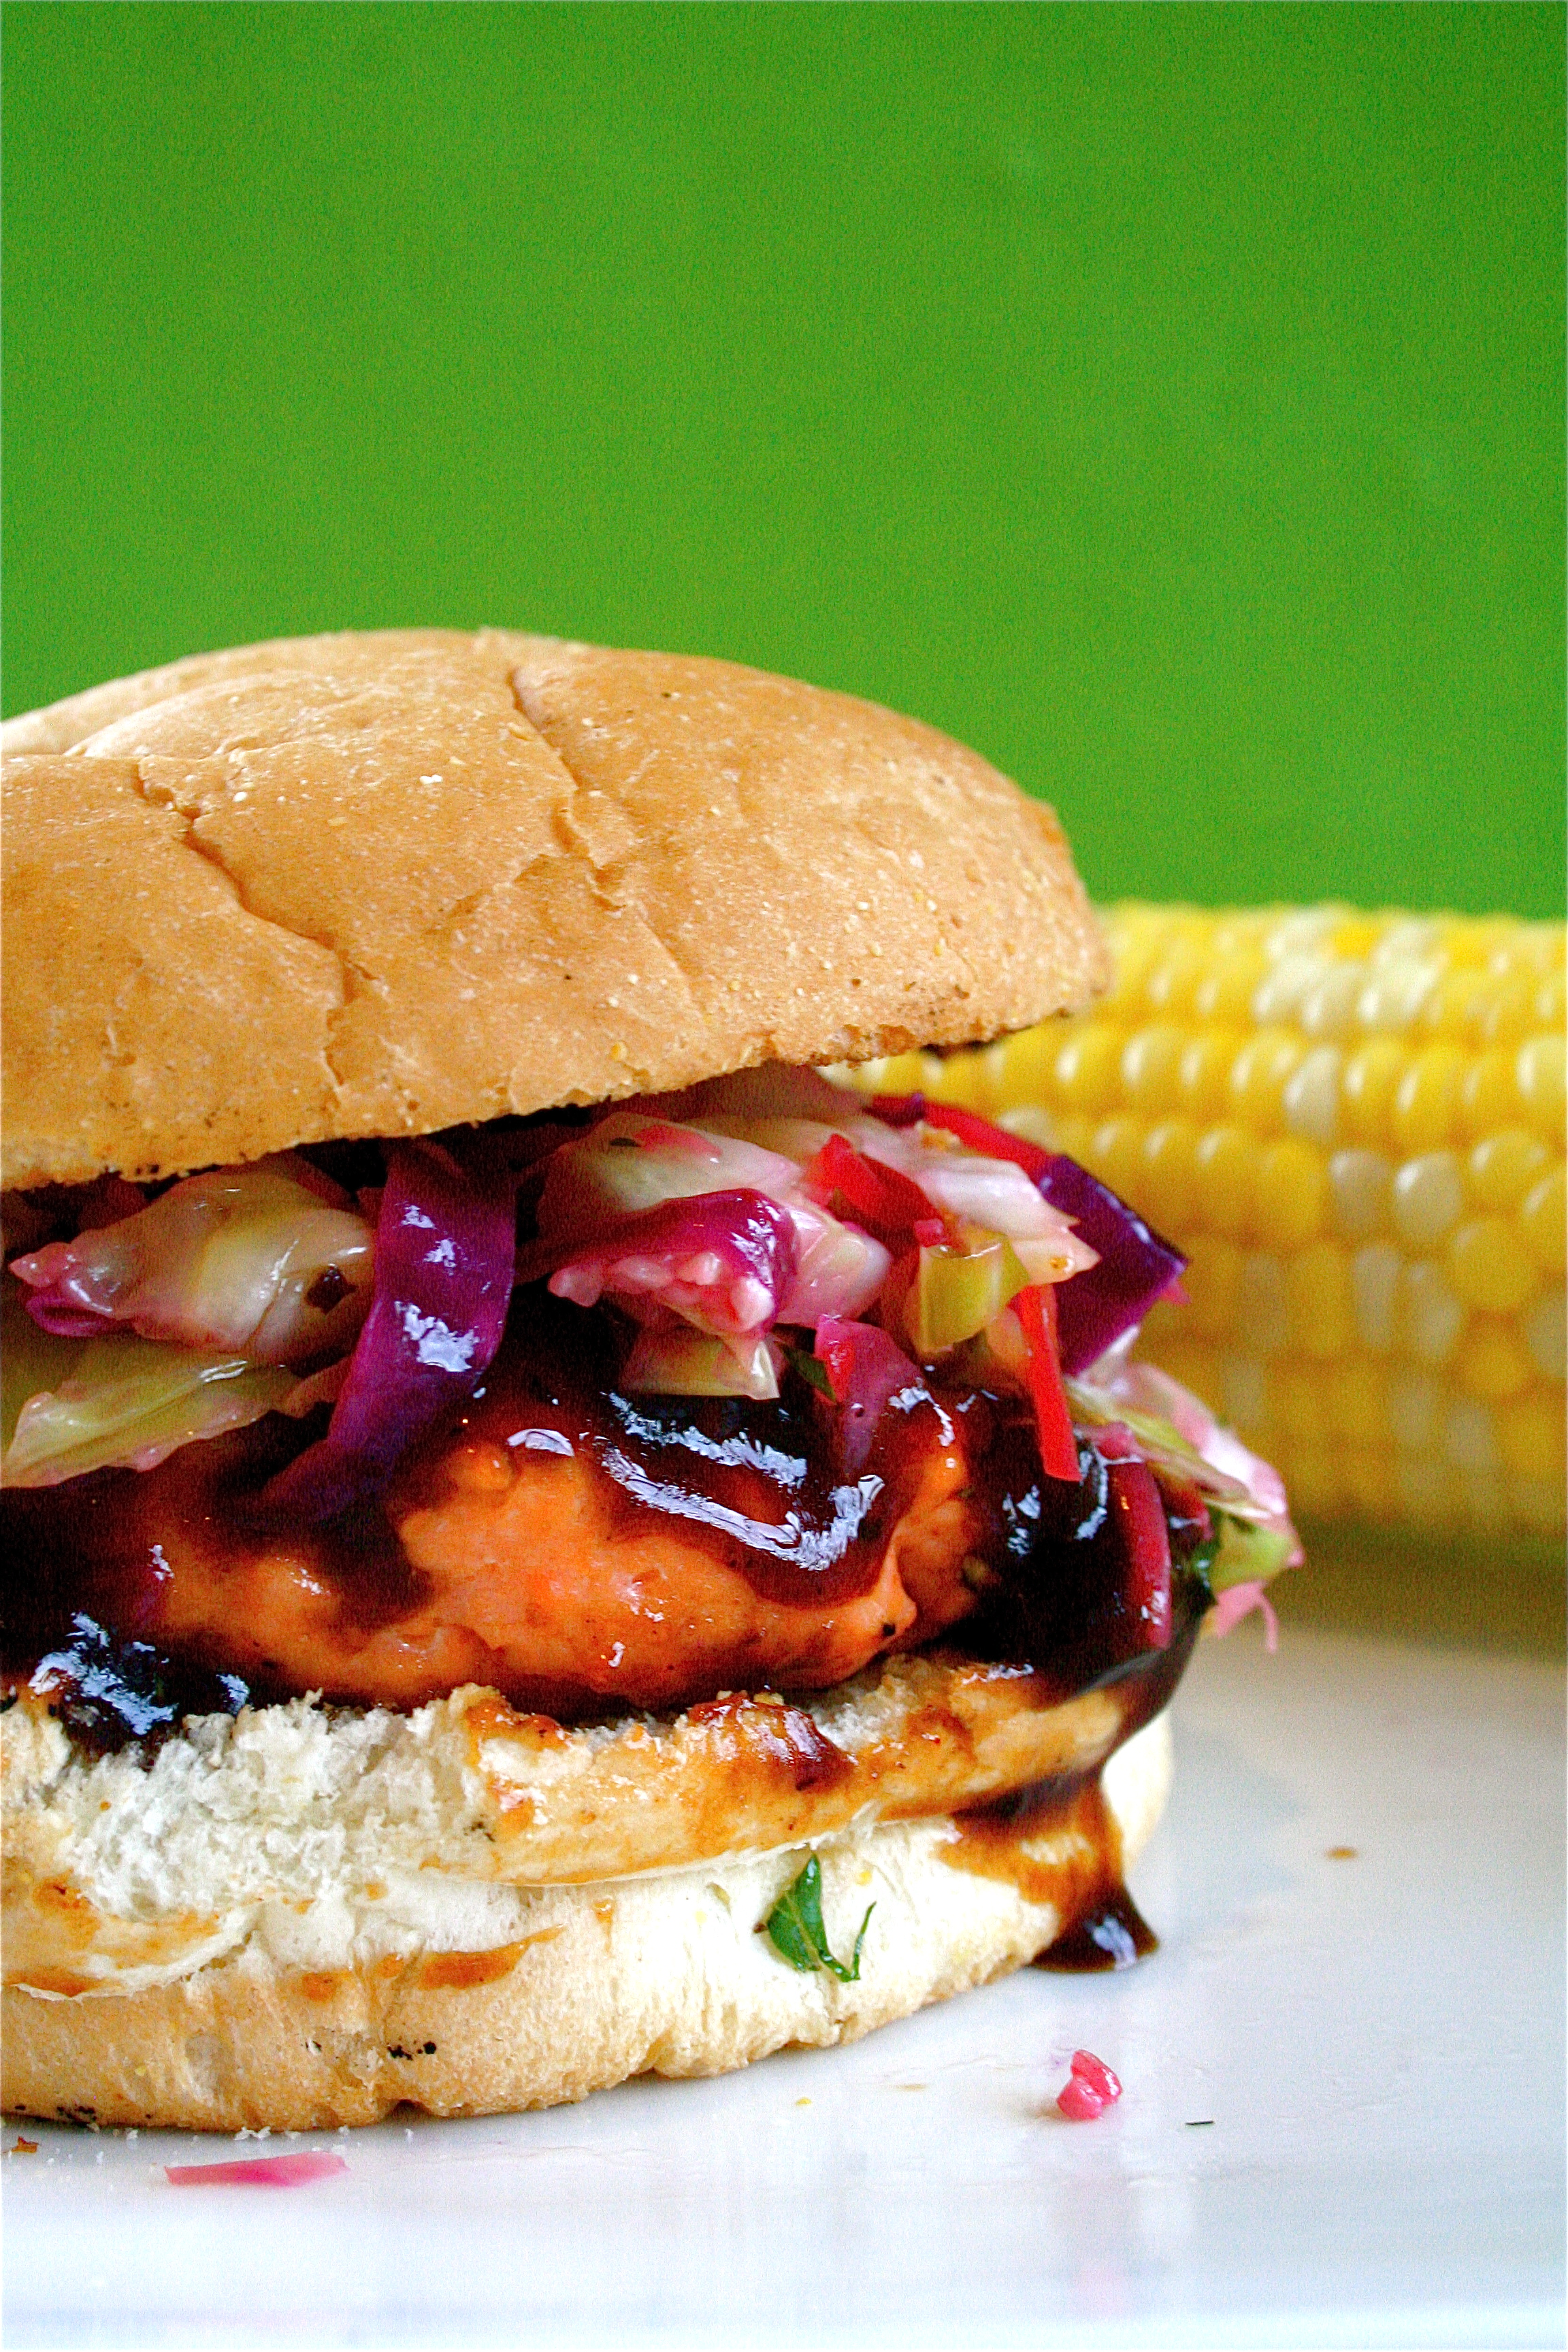
So….meet this burger.  I eat fish, and I especially eat salmon.  It’s packed with essential fatty acids, vitamins, and a good hearty dose of protein for my wimpy muscles.  I shy away from anything super complicated with the preparation of fish.  I don’t know-maybe it’s the fact that I’ve lived in the Midwest my whole life (but thankfully that’s changing in a few months….), but I really get nervous about the proper preparation and cooking of seafood.  If you have any helpful tips or suggestions, I would love to hear.  This Midwestern chick is heading to the East Coast soon and will be trying a whole new realm of cuisine (heaven).

This recipe caught my eye, and I gawked at the list of ingredients.  Yep, it’s a lot.  More than what I am used to.  But, definitely worth a shot.  The idea of a super flavorful sauce for the fish was definitely appealing, and the slaw?  I’ve never had a slaw on salmon before.  What the heck?  Since cabbage is cheap, and I actually had the rest of the ingredients on hand, I was in.  Healthy and delicious may not cancel out my recent acts of gluttony, but it certainly gets me back on track (until tomorrow….)

Salmon Burgers with Hoisin Barbeque Sauce

Servings: 4

Ingredients:

For the BBQ Sauce:

2 tablespoons canola oil

2 large shallots, coarsely chopped

2 cloves garlic, coarsely chopped

1/2 cup hoisin sauce***You should be able to find this in the Asian section of your local grocery.

2 tablespoons ketchup

2 tablespoons honey

2 teaspoons soy sauce

2 teaspoons fish sauce

1 tablespoon rice wine vinegar

For the salmon burgers:

1 and 1/2 pounds fresh salmon

2 tablespoons canola oil

Kosher salt and freshly ground black pepper

4 hamburger buns, split and toasted

For the slaw:

2 tablespoons canola oil

1/4 cup thinly sliced pickled ginger, plus more for garnish

2 cloves garlic, finely chopped

1/4 small head of red cabbage, finely shredded

1/2 medium head of napa cabbage, finely shredded

Kosher salt and freshly ground black pepper

1/4 cup rice wine vinegar

2 teaspoons toasted sesame oil

3 tablespoons finely chopped fresh cilantro leaves

Instructions:

1. For the hoisin barbeque sauce: Heat the oil in a medium saucepan over medium heat.

2. Add the shallots and garlic and cook until soft, about 2 minutes.

3.  Add the hoisin, ketchup, honey, soy sauce, fish sauce, and vinegar and cook until heated through and slightly thickened, about 10 minutes.

4. Set aside to cool.

5. For the burgers: Cut the salmon into large pieces and coarsely chop in a food processor, making sure not to overprocess.

6. Divide the salmon into 4 equal portions and form into 3/4-inch thick burgers, making a deep depression into the center of each patty.

7.  Place on a plate, cover with plastic wrap, and let chill in the refrigerator for at least 30 minutes before cooking.

8. For the slaw: Meanwhile, heat the oil in a large sauté pan over high heat.

9. Add the ginger and garlic and cook, stirring once, until soft, about 1 minute.

10.  Stir in the cabbage, season with salt and pepper, and cook, stirring once, until slightly wilted, about 3-4 minutes.

11.  Remove from the heat and stir in the vinegar, sesame oil, and cilantro.  Let sit at room temperature.

12. To cook the burgers: Heat the oil in a sauté pan or griddle (nonstick or cast iron) until it begins to shimmer.

13. Season both sides of each burger with salt and pepper.

14.  Cook the burgers until golden brown on the bottom sides, about 3 minutes.  Turn over, brush with some of the hoisin barbeque sauce, and continue cooking until medium-well, about 3 minutes longer.

15.  Place the burgers on the bun bottoms, drizzle some hoisin barbeque sauce over them, and top with the slaw.  Garnish with pickled ginger, if desired.  Cover with the burger tops and serve immediately.

Source:  Bobby Flay’s Burgers, Fries, and Shakes.

October 14, 2010 - 5:12 am

notyet100 - drooling looking at the pic,..

October 14, 2010 - 9:52 am

Rachel - This is definitely healthy and tasty looking! My salmon burgers often turn out kinda dry so hoisin sauce would be a welcome addition.

October 16, 2010 - 11:03 am

Imwaytoobusy - I would have never thought of using BBQ over salmon. Brilliant!

October 16, 2010 - 5:47 pm

Jenny Nguyen - good and healthy idea putting salmon into a burger!

October 17, 2010 - 12:27 am

Sandy - Your salmon burgers look fantastic! I had one in Seattle, but never made them at home, until now that is.

May 9, 2011 - 5:45 pm

Vegetarian Chili | The Healthy Haven - […] and sweet recipes that might interest you. In fact, a couple of them already caught my eye like the Salmon Burgers with a Barbecue Hoisin Sauce and the Peanut Caramel Topped Brownie Cake, which looked quite decadent, by the way. As for this […]

April 8, 2013 - 6:45 pm

Vegetarian Chili - […] and sweet recipes that might interest you. In fact, a couple of them already caught my eye like the Salmon Burgers with a Barbecue Hoisin Sauce and the Peanut Caramel Topped Brownie Cake, which looked quite decadent, by the way. As for this […]