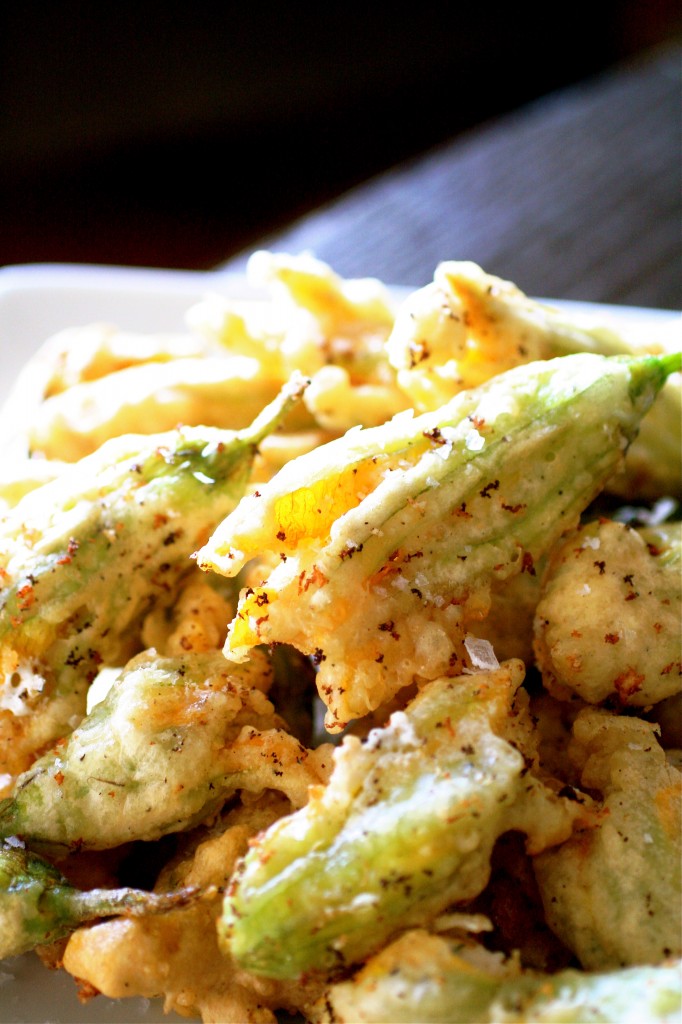
Zucchini Blossoms

Cross this one off the bucket list.  Frying up some zucchini blossoms has always been something that I have wanted to do.  And I will be doing it again.

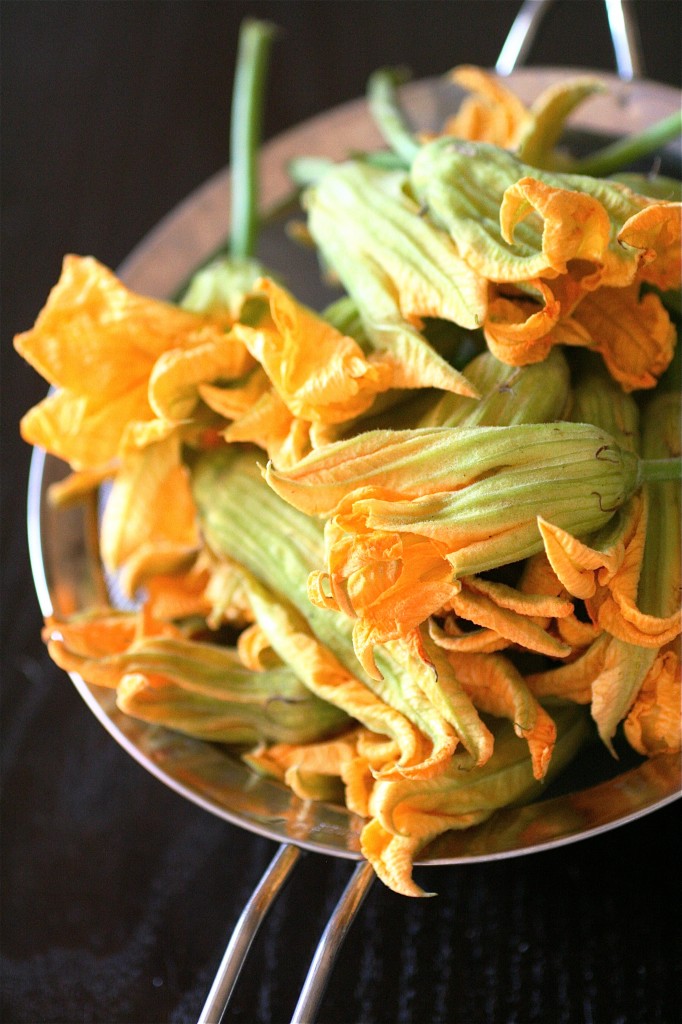
Found usually only in CSA’s, farmers’ markets, or your own backyard garden, zucchini blossoms appear for just a short time each year.  I’ve always seen recipes with them, some simply beer-battered and fried, and some, like these, filled and twisted up with a mellow cheese mixture….then fried.  No, it’s not the healthiest snack in the world.  But, man, for just a short window each late summer, they are worth the dietary splurge.

Avoiding a trip to Whole Foods, I decided to head up to the Milwaukee Public Market yesterday.  Amazingly, I happened to have cash on me, and the outdoor market was packed.  The fresh produce stand was on my list of booths to hit, and then I realized that they happened to have large bags of these particular blossoms…for $2.  Ummm, yes, please.  Excitedly, I headed home, also realizing that I had a brick of cream cheese in the fridge and a bottle of vegetable oil in the pantry that I had never used.  Boom.

After separating out the blossoms (and finding some friendly garden bugs which I let loose off my balcony), I quickly rinsed the blossoms and got rid of any that looked shriveled or wimpy.  These were fresh, and, in order to make the most of these guys, yours will need to be, too.  I ended up with about 24 good blossoms, ready to fill and get fried.    The petals can be ultra delicate, so be extremely careful in your handling of them.  I definitely lost a few.

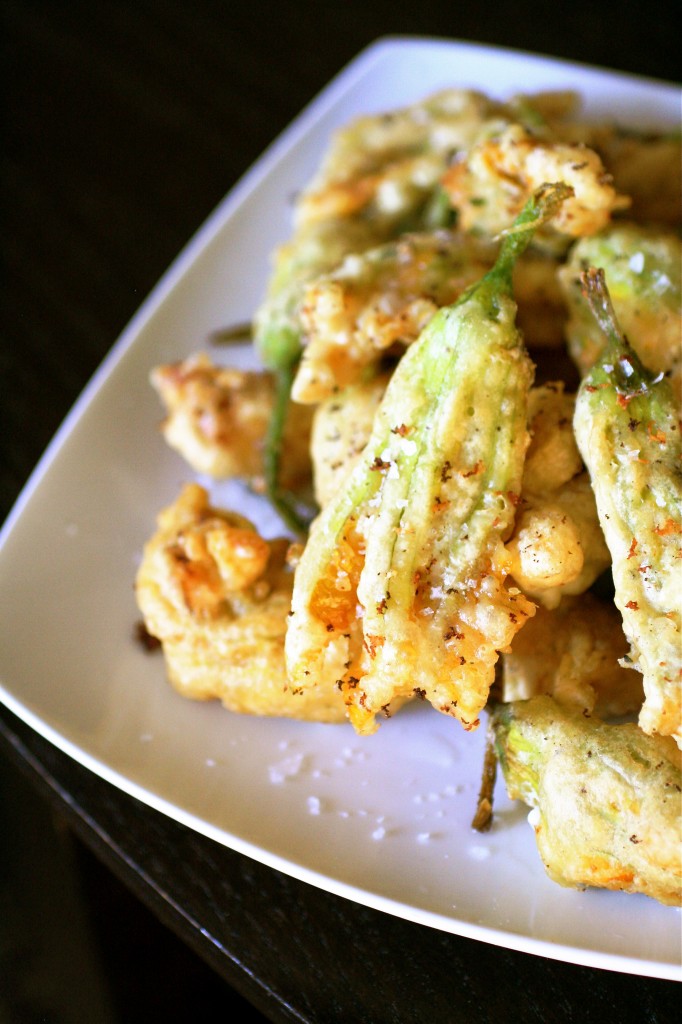
Served warm with a sprinkling of flaky sea salt, these were a moment of pure late summer bliss.  Now, hurry and go get yours before they are gone.
Zucchini Blossoms

Servings: enough for 2-3 people

Ingredients

Fresh zucchini blossoms, about 24, pistils removed and cleaned gently

For the batter:

3/4 cup cornstarch

1 teaspoon baking powder

Pepper, to taste

1/4 cup all-purpose flour

Salt, to taste

For dredging:

1 egg, lightly beaten

1/2 cup water

For the filling:

One 8-ounce brick of cream cheese, at room temperature

1/2 cup ricotta cheese, at room temperature

Salt and pepper, to taste

1-2 tablespoons fresh chives, chopped

Vegetable oil, for frying (I used an entire 1.5 quart container)

Special equipment:  a deep-frying thermometer, a piping bag/pastry tip to pipe the cheese in the blossoms (or use a plastic baggie with a corner cut off)
Instructions

1. For the batter: In a medium bowl, whisk together the cornstarch, baking powder, pepper, flour, and salt, mixing well.

2. Gently whisk in the beaten egg and the water, mixing until smooth.  Cover and let chill in the refrigerator for about 15-20 minutes.

3. For the filling:  In the bowl of your standing mixer fitted with the paddle attachment (or using an electric hand mixer), combine the cream cheese and ricotta and mix at medium speed until smooth.

4. Add the salt and pepper and chives, mixing well.

5. To assemble: Place the cheese filling into a pastry bag fitted with a round tip and gently pipe about one teaspoon of the cheese filling into each blossom, carefully twisting the blossoms around the cheese to prevent it from leaking out (Just try your best.  I found it to be a little difficult because my blossoms were so delicate, but just do the best you can.)

6. Meanwhile, pour about 1 inch or so of vegetable oil into a heavy-bottomed sauce pot.  Attach your thermometer and heat the oil until it reaches about 350 degrees.

7. Once the oil is heated, carefully dip each blossom into the batter, coating each one completely.

8. Fry the blossoms in batches, frying for about 2 minutes or so on each side, using tongs to carefully flip the blossoms.  Transfer the fried blossoms to a serving plate and generously sprinkle with sea salt.  Serve immediately.


Source:  Adapted from the Kitchn.


September 17, 2012 - 12:32 am

Crave « Miss D. Daily – HOME - […] Image and recipe courtesy of The Curvy Carrot.  […]

September 18, 2012 - 2:23 pm

Emily - ever since an episode of Frasier when Nyles mentions these I have always wondered if you can actually eat them! You have now inspired me to make them. thank you!

August 15, 2013 - 10:32 am

JB & Renee - Zucchini blossoms are just gorgeous. So pretty, cooked or uncooked. 🙂

August 3, 2014 - 3:07 am

Sylvia - Can you use male flowers or female or does it matter.

August 3, 2014 - 10:18 am

srlacy - Hi Sylvia-

I used both for mine-just picked them up randomly at a farmers’ market all mixed together. Enjoy! 🙂

Samoas Bars


Baking/cooking has always been a creative and cathartic outlet for me.  Anyone who has ever lived with me can attest to that. When the tough gets going, I get baking.  Which always seems to work out for those around me because they end up with the majority of the leftovers.  For whatever reason, the action of completing the dish, from start to finish, the mixing/stirring/chopping, the dash of this and pinch of that, the first bite-it’s all a therapeutic exercise in taking my mind off of whatever might be monopolizing it that day.

So, as you read this, I’m probably on a plane somewhere over the southeastern United States going to take a pretty big exam.  Been there, done that.  Can’t tell you how many times I’ve taken these kinds of tests.  But, hopefully, this will be my last one.  I’ve studied pretty much non-stop for the past month or so-and I’m *really* ready for this to be over with.  The best part is the reunion I’ll be having with some of my great friends who also happen to be taking the test at the same time.  Always the optimist, this is what I am looking forward to.

So, these Samoas Bars, archived for umpteen months in the “Things I Seriously Need to Bake”  category on my computer (which is kind of like that “emergency bar of chocolate” that some people may have….) made their appearance during a study break.  Best decision ever.  I stored them in the fridge overnight and couldn’t help going back and forth all night and almost ate the whole container.  I took them to work instead, and they seemed to be a big hit.  There’s nothing like turning something stressful into something that brings people joy-that’s my M.O.

I’ve never made a caramel with sour cream, so that’s one of the reasons why I tried this particular recipe.  I loved it.  I picked a brand of sour cream, which is, in my opinion, more tangy than most other brands, and I felt like it really balanced out the super sweetness of the rest of the bars.  While making the homemade caramel can be a little intimidating, it’s really not that bad.  Just be careful that you don’t splatter yourself, like me.  🙂

Samoas Bars

Servings: about 20 bars

Ingredients

1 and 1/2 cups granulated sugar

3 sticks (yes, I know…fully aware.  Moderation, people.) unsalted butter, at room temperature

1 cup sour cream, at room temperature (this is important-you don’t want your caramel to seize if the sour cream is cold)

1 teaspoon vanilla

1/2 teaspoon salt, divided

2 cups flour

1/2 cup dark brown sugar

2 cups unsweetened flaked coconut


For the chocolate:

10 ounces high-quality dark chocolate, chopped


Special equipment:  a candy thermometer for tempering your chocolate

Instructions

1. Preheat the oven to 350 degrees.

2. For the caramel: In medium heavy sauce pot over medium-low heat, melt the sugar, without stirring, until it is completely melted (I swirled mine around the pot a  few times to make sure it was evenly distributed.) While I was doing this (and checking the sugar every minute or so), I went ahead and prepared the dough.

3. Once the caramel is completely liquified and amber brown in color, remove the pot from the heat and add one stick of butter (very carefully!)

4. Stir until the butter is completely melted.

5. Carefully, add the sour cream, vanilla, and 1/4 teaspoon of the salt.  Stir until completely mixed; set aside.

6. For the dough: Line a 9×13-inch baking with parchment paper and lightly spray with cooking spray (if you have it-I found this made removing the bars easier.)

7. In a large bowl (or the bowl of your food processor, which I found to be WAY easier), whisk or pulse together the flour, dark brown sugar, and 1/4 teaspoon salt.

8. Add the remaining two sticks of butter, in pieces, to the mixture.  If using a bowl, use a pastry cutter to gently blend the butter into the dough.  If using a food processor, pulse the mixture until the butter is blended in and the mixture resembles coarse sand.

9. Gently press the dough into the prepared baking pan.

10. For the coconut topping:  Once the the caramel is slightly cooled, add the coconut flakes to the caramel, mixing well.

11. Spread the caramel/coconut topping evenly over the dough.

12. Bake the bars until the dough is lightly golden, about 45 minutes or so.  Remove from the oven and let cool completely before cutting. (Cut the bars before making the chocolate-it’s easier this way.)

13. For the chocolate: In a heatproof bowl set over a pot of simmering water, melt about two-thirds of the chocolate until it reaches 105 degrees.

14.  Once it reaches 105 degrees, remove the chocolate from the heat and add the remaining one-third of reserved chocolate, mixing well.  Your goal is to keep the chocolate at 88 degrees.  If you need to increase the temperature to do this, return the pan to its original place over the simmering water.

15. Maintaining the temperature at 88 degrees (or so-I totally cheated a little with this because I got impatient), dip the bottom of each bar into the chocolate and place on waxed paper to cool.  Repeat with the remaining bars.

16.  Using a piping bag or a small spoon, lightly drizzle the extra leftover chocolate over the tops of each bar.  Let cool completely.


Source: Directly from Delementals.


September 11, 2012 - 11:19 am

Christina @ This Woman Cooks! - So delicious! I love samoa bars 🙂

September 11, 2012 - 11:31 am

Katrina @ Warm Vanilla Sugar - Mmm these look fantastic!! And I totally dig the butter!

September 11, 2012 - 2:16 pm

Chung-Ah | Damn Delicious - Samoas are my absolute favorite (of course). The fact that you turned these into bars makes them even better!

September 11, 2012 - 9:17 pm

Ann P. - OH my gosh I am so ready for girl scout cookie season!! while I’m waiting 5 more months or so, i will make these to tide me over 🙂

September 11, 2012 - 11:20 pm

what katie's baking - baking is an outlet for me, too.
these look so good, i love samoas, and in bar form they look a million times better.

September 12, 2012 - 9:28 pm

Ashley @ Wishes and Dishes - Samoas are one of my faves! Love it

September 12, 2012 - 9:54 pm

samoas bars. | Cooking Pics - […] samoas bars. /* […]

September 14, 2012 - 6:36 pm

ally - sinfully delicious but totally worth it.
xo
http://allykayler.blogspot.ca

September 15, 2012 - 11:56 am

Sharon Glanville at BeBetsy - Love everything about these!

September 19, 2012 - 1:10 am

Kristi @ My San Francisco Kitchen - Hope your test went well! These samoas bars look soooo good =)

March 18, 2013 - 8:38 pm

Jessica - Has anyone actually tried to make these? I bake A LOT but that was a complete DISASTER.

April 4, 2013 - 8:36 pm

jo - I am finding it really difficult to work with caramel. It tasted a little burnt off stove, then its bubbling while baking. Not sure how it will come out. I may not make it to the chocolate stage. May have been better to use store bought chewy caramel instead.

Avocado Chimichurri Bruschetta

I picked up a copy of the Readers’ Top-Rated Recipes of Vegetarian Times a couple of weeks ago at Whole Foods.  It was an impromptu, last-minute-waiting-in-the-aisle splurge.  I thumbed through it pretty quickly, making sure that there was at least three different recipes that I would be willing to try, and these little guys just happened to be on the cover.  Needless to say, this recipe was the one that piqued my interest the most, so I knew I had to try it.

Fast forward a few days later to a beautiful late summer evening on my balcony, overlooking the water, with a glass of chilled white wine, and I picked up the magazine to fully delve into it (heaven?  Is heaven just a little bit like this?  Well, to me, it is.).  I dog-eared pretty much every page in the thing.  If you can still get your hands on a copy of the issue, please try.  There are a ton of awesome vegetarian recipes in this issue-but don’t worry, I’ve got plans to try many of them and post them here in the meantime.

Since avocados are super plentiful right now for me, I knew I wanted to try this recipe.  An easy, heart-healthy appetizer that seemed to be an interesting diversion from the usual tomato/beans/cheese/sour cream pairings with avocado to a Latin-inspired tangy twist.  I was extremely (and pleasantly) surprised.  The lemon and red wine vinegar pack a punch with the creaminess of the avocado, and when paired with a sweet, multigrain baguette, the flavors really compliment one another.  The other good news?  This is a super simple crowd-friendly appetizer that takes about 10 minutes to throw together. While I was toasting my baguette slices in the oven (I lightly brushed them with extra-virgin olive oil and sprinkled them with flaky sea salt and toasted them at 250 degrees for about 10-12 minutes or so….), I had the whole bruschetta ready to go.  I omitted parsley (the original recipe calls for a 1/4 cup), but I’m not a fan, so feel free to add it in with the cilantro if you are.

Avocado Chimichurri Bruschetta

Servings: serves 4-6 people as an appetizer


Ingredients

2 tablespoons fresh lemon juice

2 tablespoons red wine vinegar

3 garlic gloves, minced

1 teaspoon sea salt

1/2 teaspoon red pepper flakes

1/2 teaspoon dried oregano

Black pepper, to taste

1/4 cup extra-virgin olive oil

1/4 cup cilantro, chopped coarsely

2 avocados, pitted, peeled, and cubed

6 (or however many you want) 1/2-inch thick slices whole grain baguette, toasted

Instructions

1. In a medium bowl, whisk together the lemon juice, red wine vinegar, garlic, salt, red pepper flakes, oregano, and black pepper, mixing well.

2. Very slowly, add the olive oil, whisking constantly, until well-emulsified.

3. Stir in the cilantro.

4.Very carefully, fold in the avocado cubes, tossing to thoroughly coat with the olive oil mixture.

5. Spoon onto the toasted baguette slices and sprinkle with additional sea salt, if desired.  Serve immediately.

Source:  Slightly adapted from Vegetarian Times: Readers’ Top-Rated Recipes (special edition issue).

September 9, 2012 - 11:13 am

Annie @ Annie's Cooking Lab - Those look amazing! Vegetarian Times is one of my favorite cooking magazines, I’ll have to keep my eyes out for the top recipes edition!

September 9, 2012 - 11:17 am

Blog is the New Black - LOVE anything with avocado. This looks exceptional!

September 9, 2012 - 11:49 am

Katrina @ Warm Vanilla Sugar - This sounds fabulous! Yum!

September 9, 2012 - 12:59 pm

Katrina (gluten free gidget) - You may be a genius… I’m just sayin’…

September 9, 2012 - 4:04 pm

Jillian {Her Split Ends} - um….YUM. This looks and sounds amaz-balls! Its going to be happening in this house very very soon!!

Cheers
~ Jillian
http://www.hersplitends.com

September 9, 2012 - 6:17 pm

Nesrine - oooh delish!!!

September 9, 2012 - 9:22 pm

Chung-Ah | Damn Delicious - You had me at avocado! I can’t wait to make this for my next dinner party!

September 9, 2012 - 10:42 pm

Courtney - Oh yum! 🙂 These look wonderful. Vegetarian Times is my fav magazine. I’ll have to go pick up the new edition. Thanks for sharing! 🙂

September 10, 2012 - 11:50 am

Peggy - I was just daydreaming about chimichurri not too long ago – you must have read my mind because these sound fabulous!

September 10, 2012 - 1:53 pm

Gallery Basket One – Bon Appetite – Scarlett Skillet - […] Avocado Chimichurri Bruschetta at The Curvy Carrot […]

September 12, 2012 - 2:21 am

Ann P. - The way you seasoned the avocado sounds amazing!! I have to try this when my sister comes over for sure. A plate of these, some chick flicks, and wine is all we need!

September 19, 2012 - 2:09 am

Avocado bruschetta | clementinecuisine - […] how much I like it. And I opted for this marvellous bruschetta, which I’d seen on one of my favorite blogs a few days […]

September 19, 2012 - 2:20 am

Bruschetta d’avocat | clementine cuisine - […] et là, c’est le drame. A la place, ces petites tartines me faisaient de l’oeil sur un de mes blogs préférés, alors je me suis dit que c’était l’équilibre parfait entre une orgie d’avocat, […]

December 21, 2012 - 3:44 pm

PinLaVie... Make your pins come true – Avocado Chimichurri Bruschetta - […] Avocado Chimichurri Bruschetta No Comments.   « 2-Step Pumpkin CheesecakeCaramel Peanut Topped Brownie … » […]

December 26, 2012 - 6:01 am

Vegan Finger Food Recipes | Eat Drink Better - […] Avocado Bruschetta – Bruschetta traditionally gets its richness from cheese, and avocado is an excellent substitute. […]

January 20, 2013 - 5:01 pm

Carrie - Tried this….soooo good! Will be making this again and again and again…..

May 8, 2013 - 11:32 pm

5 easy summer appetizers | Mochatini - […] 4. Avocado-chimichurri bruschetta […]

July 2, 2013 - 4:05 am

Stephanie - Someone made these for a baby shower I attended and I was hooked! They are so good and very easy to make. I now serve them whenever we entertain guests or have to bring an appetizer to someone’s house.

Up next…your Pad Thai. Thanks!!

July 2, 2013 - 11:15 am

srlacy - I’m so glad to hear that! The Pad Thai is great, too!

February 7, 2014 - 5:08 pm

106 Reception Hor D’oeuvres for Artists: 67 Grouped by number of ingredients | - […] Cheese and Apple Avocado Chimichurri Bruschetta Key Lime Pie […]