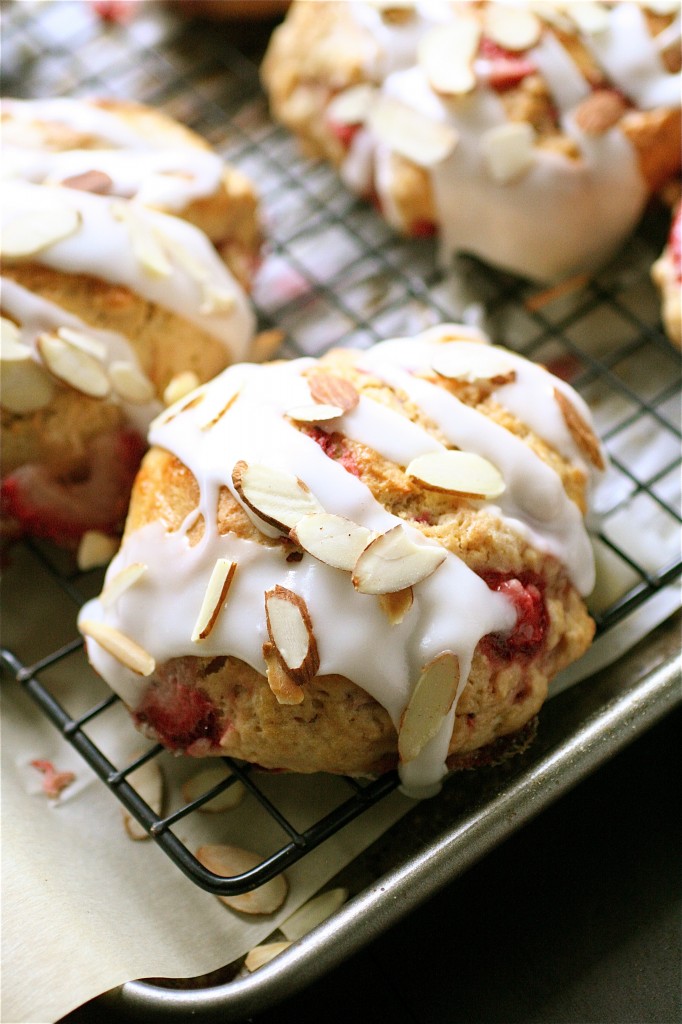
Strawberry Almond Scones

I’m not a breakfast carbohydrate kind of person.  Maybe we’ve discussed this before.  I like my coffee either black or with cream in the mornings, thank you very much.  No fancy muffins or biscuits.  Until now….

I had a surplus of strawberries about a month ago (and then, I conveniently forgot to post this recipe, so hopefully you still have access to fresh strawberries….ooops.), and I didn’t know what to do with them.  I had run out of coffee beans the day before, so I stopped on my way to work to pick up a *giant* heavily-caffeinated regular coffee, and, on a whim, I decided to also pick up a scone to go along with it.  Call it a momentary lapse of sanity on my end, but, I’m glad I went with it.  That day?  Awesome breakfast in my office.

So, to use up some of those strawberries (and the buttermilk that I always seem to have….which I hardly use…which then also creates a vicious cycle of trying to find ways to use up the buttermilk….), I decided to make a batch of these scones to try out for breakfast myself.  A side note here:  these also freeze nicely.  I froze a whole bunch and then would take one out at a time (I either let it thaw, covered, in the fridge overnight, or I would quickly defrost it in a microwave when I got to work.)  Oh, holy yum.
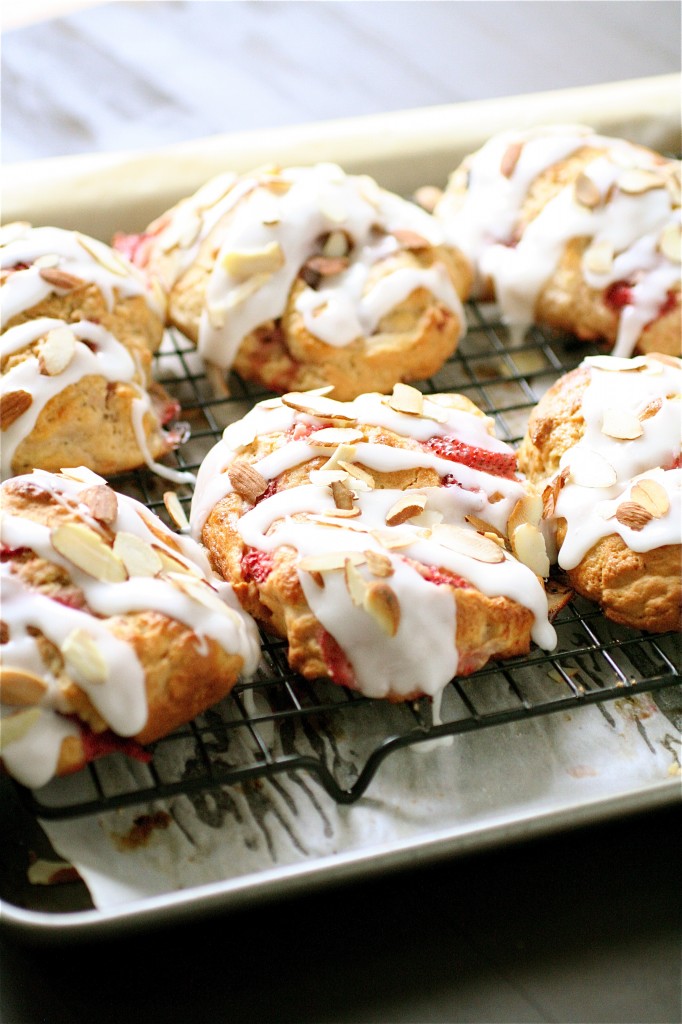
Strawberry Almond Scones

Servings: about 10-12 scones


Ingredients

For the scones:

1 and 1/2 cups all-purpose flour

1 and 1/2 cups whole wheat pastry flour

1/4 cup plus 2 tablespoons granulated sugar

1 tablespoon baking powder

1/2 teaspoon baking soda

1/2 teaspoon salt

8 tablespoons (1 stick) unsalted butter, cold, cut into 1-tablespoon pieces

1 and 1/4 cup buttermilk, plus more for brushing the tops of the scones

1 and 1/2 cups strawberries, sliced

2 tablespoons granulated sugar, for dusting the tops of the scones

For the buttermilk glaze and topping:

2 cups powdered sugar

3 tablespoons buttermilk

1/2 teaspoon almond extract

Pinch sea salt

1/2 cup sliced almonds, toasted
Instructions

1. For the scones: Preheat the oven to 400 degrees.

2.  Line two baking sheets with parchment paper; set aside.

3. In a large bowl (I actually used my large food processor here-it made it a lot easier), combine the flours, sugar, baking powder, baking soda, and salt.  Mix until combined.

4. Add the butter, one piece at a time, mixing well after each addition.  If you are using a food processor, pulse until the mixture resembles coarse sand.  If you are not using a food processor, use a pastry blender or your fingers to crumble the butter.

5. Add the buttermilk and the sliced strawberries, mixing until well combined.

6. Gently scoop out about 1/4-cup portions of the dough onto the prepared baking sheets and slightly flatten each with your fingers.

7. Using a silicone or pastry brush, gently brush the top of each scone with buttermilk.  Lightly sprinkle each scone with the 2 tablespoons granulated sugar.

8. Bake the scones until lightly golden around the edges, about 30-35 minutes, rotating and switching the baking sheets halfway through the baking time.

9. Let cool for about 30 minutes before glazing. (In the meantime, make your glaze.)

10. For the glaze:  In a medium bowl, whisk together the powdered sugar, buttermilk, almond extract, and the pinch of salt.  Let sit at room temperature until you are ready to glaze the scones.

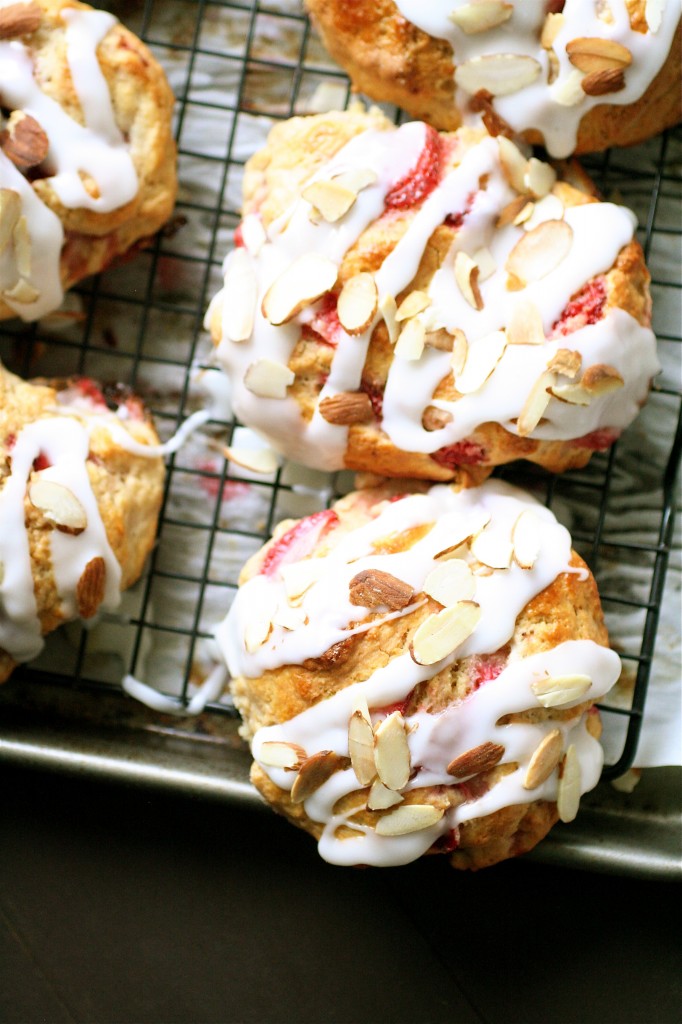
11. Once slightly cooled, carefully drizzle the glaze over the scones (I found it helpful to put the cooling rack that the scones were on directly over my rimmed baking sheet while glazing-super easy clean-up!).  Top each scone with a small handful of toasted almond slices.

Source: Food and Wine.


September 6, 2012 - 6:55 am

Katrina @ Warm Vanilla Sugar - Mmm these look sooo awesome!

September 6, 2012 - 7:22 am

Cherine - Those scones look wonderful!

September 6, 2012 - 1:05 pm

Kim@hungryhealthygirl - Those look devine and I’m afraid they would be very dangerous in my household! I’m with you on the buttermilk!

September 6, 2012 - 1:51 pm

abbe101 - Just showed this recipe to my hubby – he’s raiding the cupboards to see if we have the ingredients… he has *almond issues* 😉

September 6, 2012 - 5:20 pm

what katie's baking - i’m not really a breakfast carb person either… but these might change me 😉 they look fantastic!

September 6, 2012 - 6:38 pm

Carol | a cup of mascarpone - These look absolutely lovely…and delicious!!!

September 7, 2012 - 2:12 am

Ann P. - Beautiful!! Strawberry and almond go together wonderfully. 🙂 I love that stripey glaze, too! Looks completely Starbucks-worthy 🙂

September 8, 2012 - 8:51 pm

Claire @ Simply Sweet Justice - Everything tastes better with a glaze/frosting of some sort! A group of bloggers and I do a low-key baking club every month – if you ever want to join, just give a shout. 🙂

September 22, 2012 - 1:54 am

Maria - I always end up with excess buttermilk, too. I read somewhere that it can be frozen, so I now freeze them in 1-cup increments in ziploc bags. No more wasted buttermilk! Added bonus: I always have buttermilk on hand that defrosts quickly when placed in lukewarm water.

September 22, 2012 - 2:59 am

Vera Zecevic - Cupcakes Garden - So nice recipes! This treats looks so delicious! I am in to make this!

September 22, 2012 - 12:17 pm

srlacy - Maria! That is absolutely brilliant-I am totally doing this from now on. Thank you for the tip!

October 6, 2012 - 1:51 pm

Roxanne - Love love love scones… this sounds so good.. makes me want to have a “tea” with the girls…. and than you Maria for the tip on the freeze tip for buttermilk.. I too always end up with extra and search for ways to use it so it does not go to waste…

May 5, 2013 - 11:12 am

Strawberry Almond Scones | Dreamy Blog - […] Good taste, budget-friendly, easy-to-prepare and healthy, this dish has all of these advantages! These are reasonable enough to prepare this dish for your family! I’m quite definite that your family will love this delish dish! Don’t be surprised if they would want the same dish for their next meal!For the recipe and instructions hop on over to here […]

May 20, 2014 - 4:11 am

Strawberry Recipe Roundup – CA Grown - […] Via The Curvy Carrott […]

September 10, 2014 - 7:24 am

Strawberry Almond Scones | Island Bakes - […] Source: Adapted from The Curvy Carrot […]

Portobello Sliders

Want another slider recipe? Yeah, I know, I know.  I’m posting two sliders back to back, but it’s Labor Day Weekend, and I figured another vegetarian (and this one is vegan-friendly) recipe might be helpful for you when planning your weekend party-going festivities.

This one is super simple.  And definitely grill-friendly.  A simple olive oil marinade (I went with the basics here, but you can adjust the seasoning of the marinade to your liking.)  I added a smoked paprika because this seems to give the mushrooms a little bit more of that “meaty” flavor, but you could any spice combination that you want.  As far as toppings go, I modeled the burgers after one of those big fast food chains:  a little chopped onion/dill pickle relish, yellow mustard, and a nice generous helping of ooey-gooey-melty American cheese. But, the possibilities here are endless. Served between a pretzel roll, these won’t last long.

Hope you all have a great Labor Day Weekend!


Portobello Sliders

Servings: about 8-9 sliders

Ingredients

8 ounces portobello mushooms (I went for a container that had mushroom caps about the size of the palm of my hand-there were about 8-9 caps in the container.  They will cook down a bit, so pick a size that you prefer.), cleaned and gills removed

1/4 cup extra-virgin olive oil

1/2 teaspoon salt

1/2 teaspoon pepper

1/2 teaspoon smoked paprika

Pretzel rolls, lightly toasted

For the toppings:  cheese, mustard, chopped dill pickles, onions (your choice!)

Instructions

1. In a small bowl, whisk together the olive oil, salt, pepper, and smoked paprika until combined.

2. Place the mushroom caps on a rimmed baking sheet.

3. Using a silicone brush, gently and generously brush the marinade onto the tops of the mushrooms, turn them over, and brush the undersides of the mushrooms.  Let sit at room temperature for about 10-15 minutes.

4. Meanwhile, preheat your grill or grill pan.

5. Place the mushrooms, gill side up, on the grill or grill pan and cook until softened, about 3-4 minutes.

6. Flip the mushrooms over, gill side down, and cook for another 1-2 minutes.

7. If using cheese, add the cheese to the tops of the mushrooms at this point, and continue cooking for another 1-2 minutes, until the mushrooms are cooked through and the cheese is melted.

8. Assemble the burgers as desired.


Source:  A Curvy Carrot original.


September 2, 2012 - 9:33 pm

Chung-Ah | Damn Delicious - There is nothing wrong with posting 2 slider recipes in a row! I say bring it on! 🙂

Can’t wait to try these bad boys. I don’t think I’ve ever tried a vegetarian burger before so this is absolutely perfect for me.

Happy Labor Day!

September 3, 2012 - 3:55 am

Ann P. - I love portobello burgers! I bet they would taste even more amazing on these pretzel rolls, which I am addicted to!

September 4, 2012 - 2:59 pm

DessertForTwo - These look scrumtious! What a great viggie meal that pleases everyone 🙂

September 6, 2012 - 9:06 pm

Patricia - Ooo!! Yummy, yummy! These look great!

September 7, 2012 - 10:32 am

Javelin Warrior - Wow, these sliders look phenomenal! I’m normally not a huge fan of portobello mushrooms, but I’d eat these any day! I’m featuring this post in today’s Food Fetish Friday (with a link-back and attribution as always). Thank you so much for keeping me inspired with such delicious creations…

September 25, 2012 - 10:51 am

Robin Shatto - Where do u get the pretzel buns

September 25, 2012 - 11:09 am

srlacy - Hi Robin-

I found them at my local grocery store (it might be a Milwaukee thing).

January 14, 2013 - 9:56 pm

T - These are great. I didn’t have smokey paprika, but an online site suggested mixing 2 parts regular paprika with one part cumin. The sliders were tasty. I will look for smokey paprika. According to Bobby Flay on tv, it’s a hot and trendy seasoning right now. I didn’t have pretzel buns, but a small whole grain slider type roll tasted just fine with them. Thanks for the recipe.

May 1, 2013 - 2:24 pm

Portobello Sliders - […] For recipe visit:  thecurvycarrot.com […]

February 20, 2015 - 12:42 pm

5 Delicious (and Super Easy) Recipes for Your Oscars Party | Rebecca Minkoff RM Edit - […] Photos and recipes via L.A. Times, Epicurious & The Curvy Carrot […]

Black Bean Sliders

I had been dying to try another black bean burger recipe….and why not convert them into adorable, pint-size, and Labor Day weekend party-friendly form?  Don’t mind if I do.

I’ve posted a couple of other burger-type recipes on the blog before, including another black bean burger recipe.  This one is super simple to put together, cooks relatively quickly, and is healthy, to boot.  I made a big batch of these and then promptly froze the extras for quick weeknight meals when I don’t feel like cooking.  Double points there.

To give it a little kick, I added Sriracha, to taste.  Please omit if you don’t like spicy, and add more if you like your food smoking hot.  I thought this version had a nice balance and kick to it.  And, in order to add a little something extra, I topped the burgers with tomato, fresh avocado slices, and some Monterey Jack cheese to make them a little bit more festive.  Top them as you like.  And, one more thing, I used my grill pan because I don’t have an outdoor grill (yet), so I haven’t tried making these on a gas or charcoal grill.  I imagine that they would be just fine.  And…feel free to make them in regular sizes, too.  Although I’m a bit partial to the itty bitty burgers myself.

Looking for more Labor Day weekend ideas?  Here are a few:


  Cherry Tomato Bites

Cheese and Vegetable Quinoa Bites

Caprese Skewers

Mini Mac and Cheese Pies

French Onion Hot Dogs

Balsamic Portobello Burgers

  Black Bean Burger

Salmon Burgers with Hoisin BBQ


Black Bean Sliders

Servings: about 12 small patties


Ingredients

1-2 teaspoons olive oil

3 garlic cloves, minced

1 small yellow onion, chopped

Two 15-ounce cans black beans, drained and rinsed

1/2 cup frozen corn, thawed

1/2 cup red bell pepper, diced

1/4 cup fresh spinach leaves, chopped

1 tablespoon soy sauce

2 teaspoons ground cumin

Pinch cayenne pepper

1 tablespoon Sriracha

Fresh cilantro, chopped, to taste

Salt and pepper, to taste

2/3 cup Panko bread crumbs

1 tablespoon extra-virgin olive oil, for cooking the burgers

For assembly:  slider buns, avocado, cheese, tomato, onion, etc.

Instructions

1. In a nonstick skillet over medium heat, heat 1-2 teaspoons olive oil until shimmering.

2. Add the onions and garlic and cook until the onions are tender, about 3-5 minutes.  Remove from the heat and set aside.

3.  In a large bowl, mash the black beans using a potato masher until soft.

4. Add the corn, red bell pepper, spinach, soy sauce, cumin, cayenne pepper, Sriracha, cilantro, and salt and pepper, mixing until combined.

5. Add the Panko bread crumbs and mix until the mixture comes together to form a soft ball.

6. Using your hands, gently form small slider patties with the black bean mixture and place each onto a baking sheet.

7. Chill the patties for at least 10-15 minutes.

8. In a grill pan or skillet over medium heat, heat 1 tablespoon of olive oil until shimmering.

9. Add the black bean patties and cook until lightly crisped and cooked through, about 5 minutes per side.

10.  Serve with the toppings of your choice and enjoy.


Source:  Adapted from Mother Thyme.


August 30, 2012 - 10:29 pm

Claire @ Simply Sweet Justice - Looks delish! Your site has the best veggie recipes. They always turn out great! Have you tried any of the veggie sausages? I just got some for a week end BBQ to try. 🙂 Happy Week End!

August 30, 2012 - 11:37 pm

Ann P. - REALLY cute 🙂 Such a more reasonable serving size, too!

August 31, 2012 - 9:17 am

srlacy - Hey Claire-

I have tried a few of the different brands of veggie sausages, but I haven’t found one yet that I’m head over heels with yet. Do you have a favorite? I’m always looking to try something new.

August 31, 2012 - 10:03 am

Helene - I’ll have to try your slides, looks yum!

September 1, 2012 - 1:03 pm

abbe101 - These really do look scrumptious.

I can’t always get hold of a tin of black beans (live in deepest, darkest Cornwall), so would borlotti beans make a good substitute? Amazingly, I can nab a tin of these in the corner shop!

September 2, 2012 - 8:43 am

srlacy - Hey Abbe-
I’m not sure about the substitution, but I’m guessing that they would work. If you try it, please let me know.

September 8, 2012 - 8:50 pm

Claire @ Simply Sweet Justice - I like the Field Roast sausages – they are a bit more expensive, but really good in my opinion! 😉

July 30, 2013 - 10:35 pm

Black Bean Sliders | Flour & Hops - […] Black Bean Sliders from The Curvy Carrot […]

July 3, 2014 - 12:47 pm

5 Vegan Sliders Recipes | The Vegan Diet - […] thecurvycarrot.com Black Bean Slider recipe here […]