Chocolate Chip Cookies

I don’t think this would be considered a true blog if I didn’t include the best cookie ever on it.

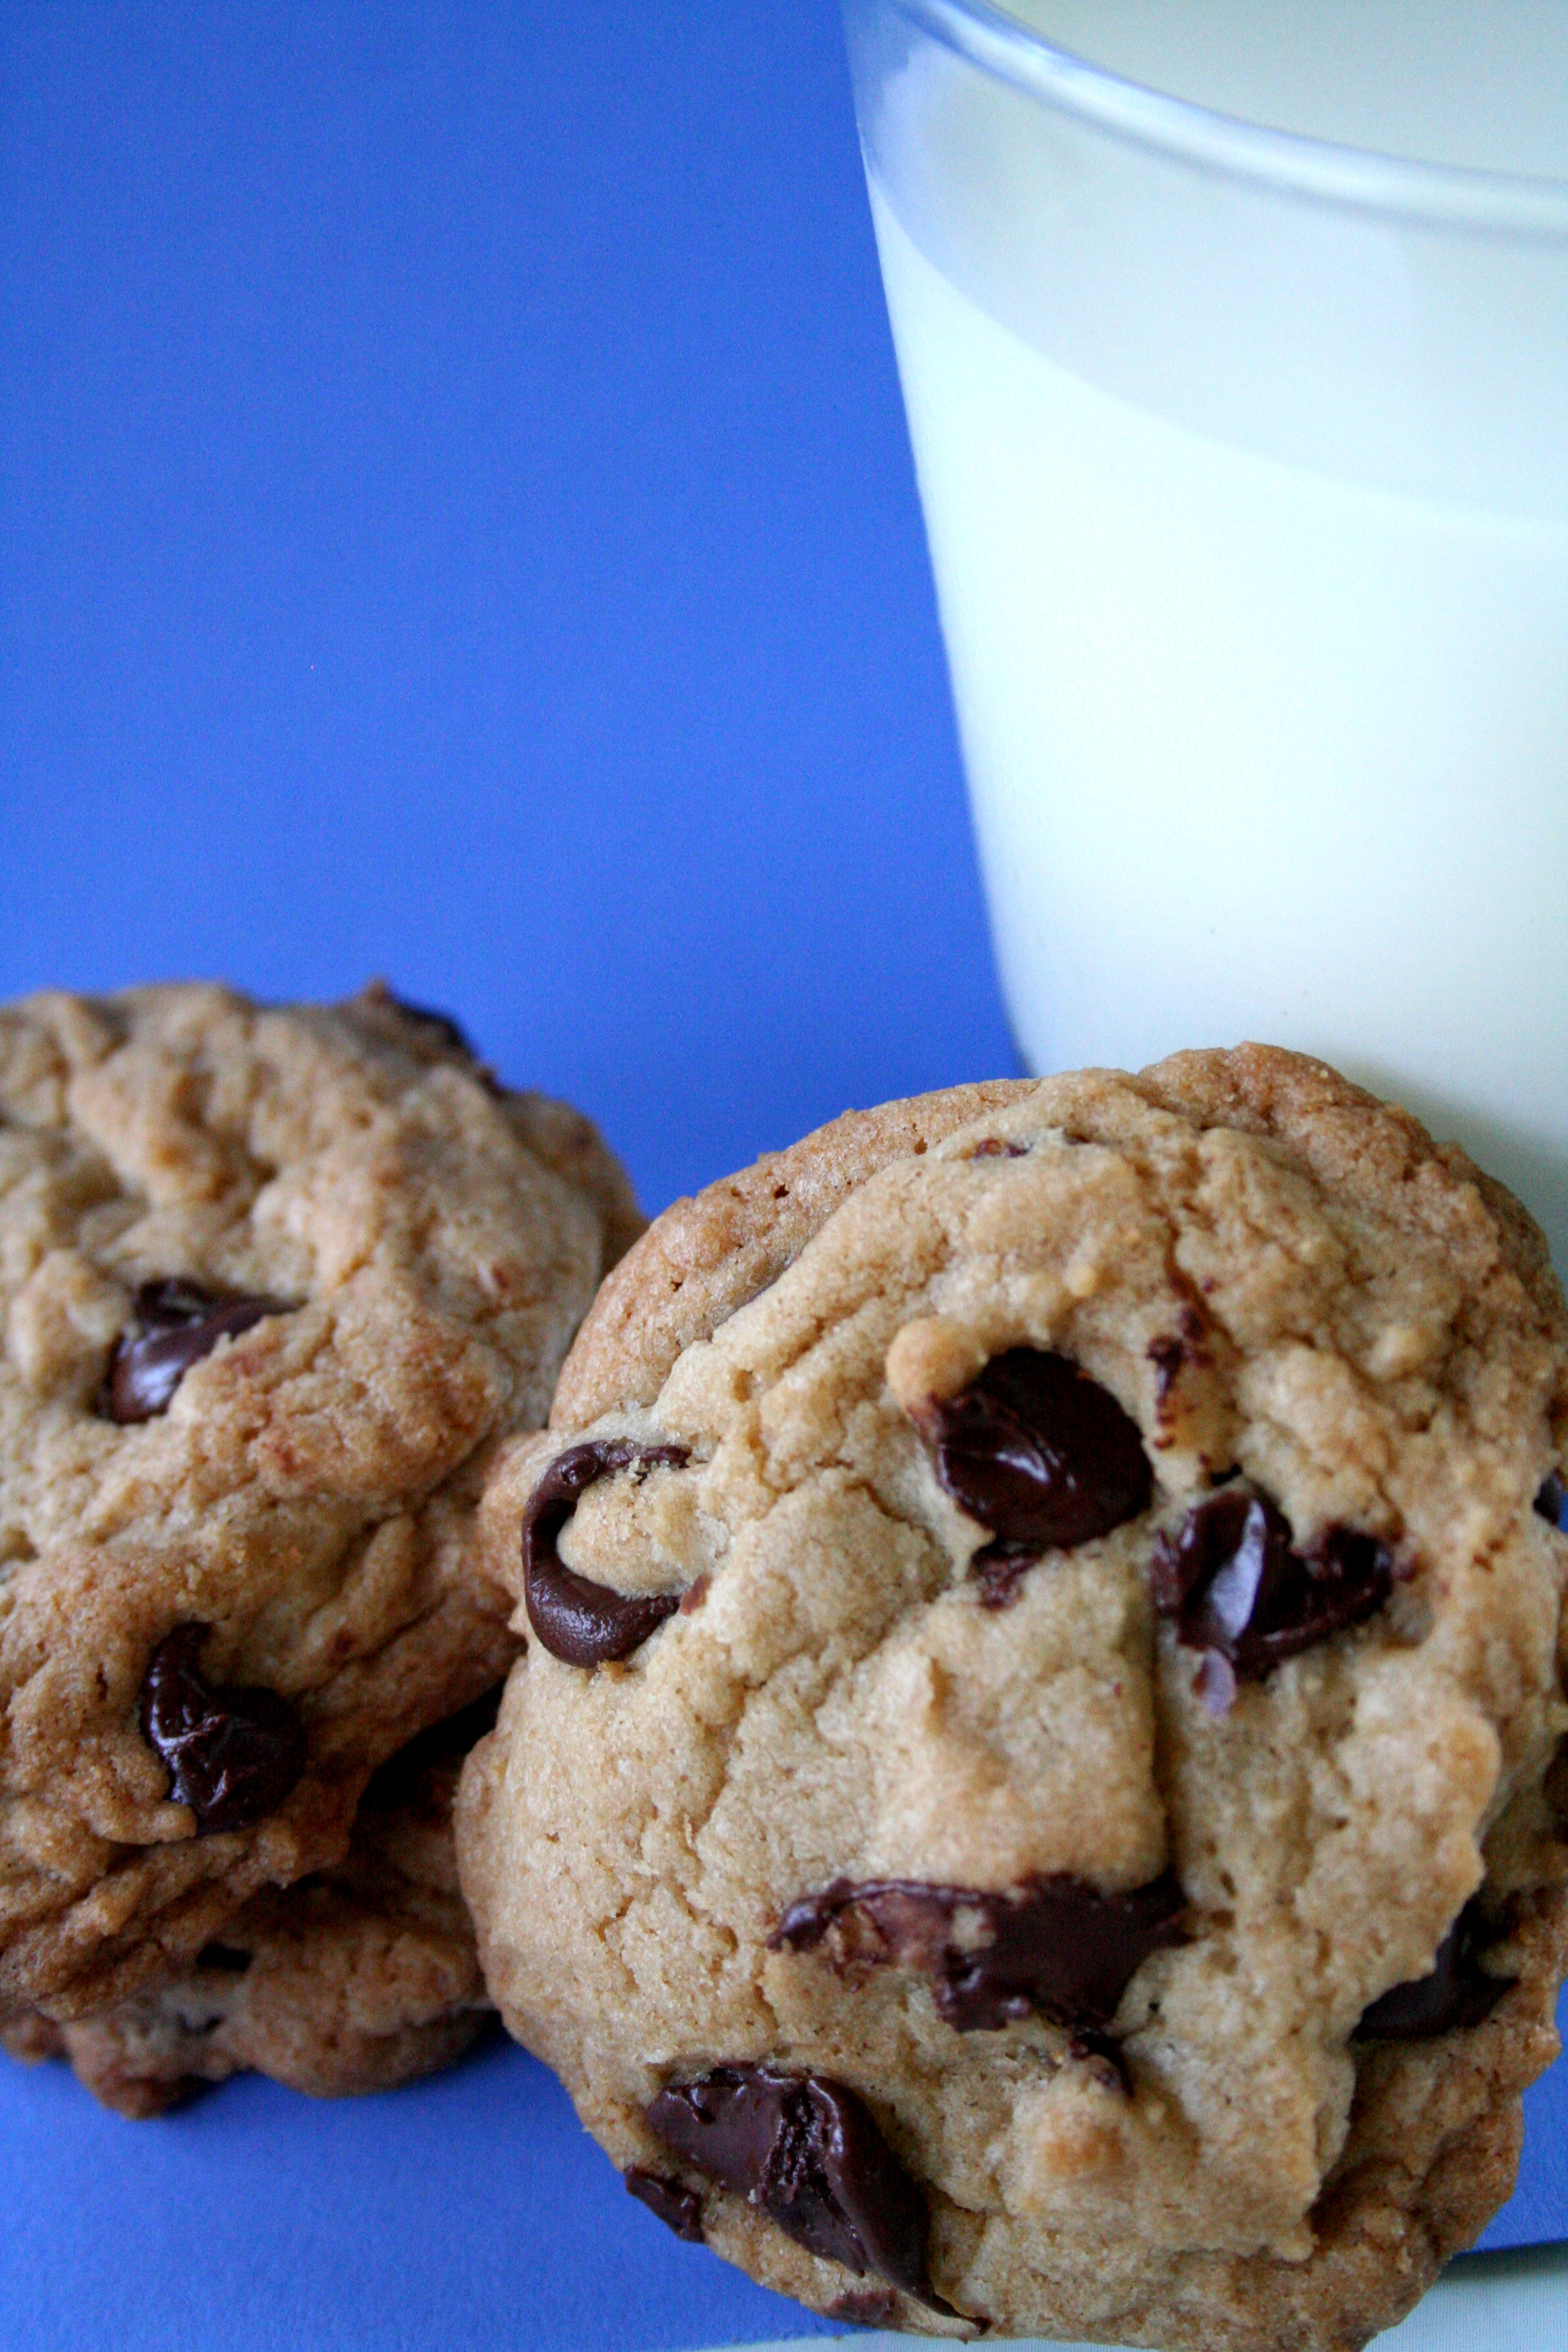
Hello, Chocolate Chip Cookie.

I made a batch of these and then promptly boarded a plane for a work trip.  I was going to be spending time with an extraordinary friend of mine, Matt K., and I knew that he would appreciate a nice dose of homemade lovin’ from my kitchen.  He recently accepted his first “grown-up” job in Boston, and, while I miss him terribly at work, I am so proud of him for all of his accomplishments.  That man is one in a million.  From helping me out at work to lending an ear and always a word of encouragement and support when I’m having a rough time, he has been a true friend to me since I first began residency back in 2007.  Matt K. is probably the biggest reason why I was able to even get into the field that I have chosen.  He is my go-to guy.  My chocolate chip cookie.

Awww.  I realize that was incredibly sappy, but it’s true.  He’s great.  Just like these cookies.

Thick and Chewy Chocolate Chip Cookies

Servings: about 18

Ingredients:

2 cups plus 2 tablespoons unbleached all-purpose flour

1/2 teaspoon baking soda

1/2 teaspoon salt

12 tablespoons (1 1/2 sticks) unsalted butter, melted and cooled until warm

1 cup packed light or dark brown sugar (I used light)

1/2 cup granulated sugar

1 large egg plus 1 egg yolk

2 teaspoons vanilla extract

1 to 1 1/2 cups semisweet chocolate chips (I swear by Ghiradelli..I also encourage you to use the greater amount.)

1.  Adjust the oven racks to the upper and lower middle positions and heat the oven to 325 degrees.  Line 2 large baking sheets with parchment paper or spray them with nonstick cooking spray.

2.  Whisk the flour, baking soda, and salt together in a medium bowl; set aside.

3.  Either by hand or with an electric mixer, mix the butter and sugars until thoroughly blended.  Beat in the egg, yolk, and vanilla until combined.  Add the dry ingredients and beat at low speed until just combined.  Stir in the chips to taste.

4. Roll a scant 1/4 cup of the dough into a ball.  Place the formed dough balls on the prepared baking sheets, spacing them about 2 1/2 inches apart.

5.  Bake until the cookies are light golden brown and the outer edges start to harden yet the centers are still soft and puffy, 15 to 18 minutes, rotating the baking sheets from to back and top to bottom halfway through the baking time.  Cool the cookies on the sheets.  Remove the cooled cookies from the baking sheets with a wide metal spatula.

*A trick my Nana (whose chocolate chip cookies were also phenomenal…and I am still hunting for that recipe so I can share) taught me was this:  To keep your cookies soft, store them in an air-tight container with a piece of bread.  The moisture from the bread will help keep the cookies soft and chewy….just like they should be.

Barely adapted from Baking Illustrated.

August 16, 2010 - 6:54 pm

Kellie - Can I just tell you how much I love your blog? I want to make all of the recipes all of the time! Mwaaa! 🙂

August 17, 2010 - 6:49 pm

Maria - I wish I could have a taste right now!

August 19, 2010 - 4:26 pm

Holistic Freedom - Decadent No Bake Chocolate Cookies…

I found your entry interesting thus I’ve added a Trackback to it on my weblog :)…

October 19, 2010 - 1:21 am

Tara - Yummy! Loved the cookies and so did the rest of my family. I just love your site here and can’t wait to try more of your recipes. Already have a meal planned for dinner tomorrow night too using two of your recipes I found today. :o)

May 13, 2011 - 5:02 am

The Curvy Carrot » Thin and Crispy Chocolate Chip Cookies - […] on hand (which is turning out to be a rarity these days), I had already posted the other chocolate chip cookie recipe (so I had to try something new), and my nephew, Elliott, was asking for “Aunt Shanon to make […]

July 14, 2011 - 5:01 am

The Curvy Carrot » Chocolate Chip Cookie Dough Cupcakes - […] Mini chocolate chip cookies***I baked mine for about 12 minutes total, but I checked them frequently to ensure that I didn’t overbake them. […]

Raspberry Mascarpone Macarons

I did it.  I made macarons, and I could not wait to post this.  I originally had it scheduled a week from now, but I couldn’t wait.  These were so good…they needed their spotlight immediately.  Ever since seeing Annie’s excitement over these tiny little French desserts, I was intrigued.  And then, when we met Helen of Tartelette in June, I realized that I had to attempt them as well.  Helen is the Queen of Macarons, and she also happens to be incredibly down-to-earth, sweet, and funny as well.  I spent an afternoon baking away with some girlfriends (Annie included), and this was on my list of “must-do’s”.  Annie helped me step-by-step, since she is way more experienced with making these delicate little (as I referred to them that day) “babies”.

First things first….you need a kitchen scale to accurately weigh out the ingredients.  The proportions matter.

Second….prep as many things as possible.  The egg whites need to “age”, i.e. sitting in a bowl in the refrigerator for 3-5 days prior to baking.  Also, pulse the almonds to a fine powder BEFORE starting to whisk your eggs.  Have everything ready to go to add to the meringue because you don’t want to risk overbeating your egg whites.

Be prepared to lose a few macarons in the process…some might stick to your Silpat and become hollow if you try to remove them from the mat.  This is also the most fantastic way to sneak a taste before they are ready to devour.  I just dipped any broken ones into my filling as I was assembling them…..fabulous!!

Raspberry Mascarpone Macarons

Ingredients

Makes approximately 12-15 macarons

For the shells:

Use the kitchen scale….it’s indispensable.

90 gr egg whites (use eggs whites that have been preferably left 3-5 days in the fridge)
25 gr granulated sugar
200 gr powdered sugar
110 gr almonds (slivered, blanched, sliced, whatever you like)
powdered food coloring, to desired color—a little goes a long way….I used a red powder sparingly to get a pink color.

For the filling:

4 oz mascarpone, room temperature
2-3 tablespoon good quality raspberry preserves (I used 3 tablespoons, and my filling was a teensy too sweet for me…I would add and taste as you go…but beware….you may not be able to stop…it’s good.)

1. Place the almonds in a food processor and pulse to a fine powder.

2. Add the powdered sugar to the almonds and pulse to combine.

3. In a stand mixer fitted with the whisk attachment, whisk the eggs to a foam (Helen says it should resemble bubble bath…..) then gradually add the granulated sugar until a glossy meringue is formed (like shaving cream).***Warning….do not overbeat.

4. At this point, I added a little of the colored powder and whipped a few times until I got the desired tint.

5. Add the almond/powdered sugar mixture to the meringue, give it a quick fold (use a rubber spatula…by hand!) to break some of the air and then fold the mass carefully until you obtain a batter that falls back on itself after counting to 10. Give quick strokes at first to break the mass and slow down. The whole process should not take more than 50 strokes. Test a small amount on a plate: if the tops flattens on its own you are good to go.

6.Fill a pastry bag fitted with a plain tip (Ateco #807 or #809) with the batter and pipe small rounds (1.5 inches in diameter) onto parchment paper or silicone mats lined baking sheets.

7. Let the macarons sit out for 30 minutes to an hour to harden their shells a bit. (We let them sit for about an hour, just to be on the safe side.) In the meantime, preheat the oven to 280F.

My little babies are resting.

8.When ready, bake for 15 to 20 minutes, depending on their size.  (I did not rotate the baking sheets during the baking process, but this would be a good idea for the most uniform color.  I was too scared that I would mess them up.  Also, sidenote: this is the fun part when you can watch them through the oven door growing their “feet”.)

9. Let them cool completely, even though you will want to eat them immediately.

My little babies are cooling now.

10.  In the meantime, mix together the filling ingredients and place into a small piping bag with a large plain tip (you can just use the one you used to pipe the shells).

11.  Once cooled completely, pipe a small amount of the filling onto smooth side of a macaron and find a similarly sized partner….fit together and…VOILA!

12. Place the macarons in the refrigerator for at least 24 hours to allow the flavors to meld together.  However, I did not do this because I couldn’t resist eating them all within 24 hours.  If you have more will power than me, I am sure that they will taste even better.

Adapted from Tartelette.

August 15, 2010 - 9:14 am

kgracie71 - These are so pretty….I keep wondering about macaron’s—-why all the hype? Maybe I’ll have to try to make some.
kg,
fortycakes.wordpress.com

August 15, 2010 - 9:23 am

Tonya @ What's On My Plate - These were your first attempt at macarons? They look FANTASTIC! I’m totally impressed.

August 15, 2010 - 2:19 pm

Vinegarlic - These look delicious, and these photos are just wonderful. I feel like I could stick my hand into the monitor and pick one up. (If only!)

August 16, 2010 - 3:02 pm

Katy - Beautiful images! And way to be on top of the dessert trend!

August 23, 2010 - 10:35 pm

Flour On My Face - I have been wanting to try macarons for months now. I even bought a scale just so I could. But I just moved 3 weeks ago and haven’t had a chance.

Yours turned out really good for your first try!

Guacamole

I could not get through the summer without posting a guacamole recipe.  Just like my Deviled Eggs, this is a recipe that I modify each time I make it.  I don’t ever write it down (this time I did, however), and I just taste it as I go.  I love the freedom of cooking this way, and hopefully I can move on to much bigger endeavors with more experience in this regard.  The beauty of this recipe is that the entire batch cost less than $3 to make.  I used fresh, juicy tomatoes right from the garden.

Sidenote: has anyone else noticed how much of a difference there is in a home-grown, fresh tomato than one that is bought at the grocery store?  This tomato came right off the vine, gave a little when I cut into it, and the vibrant red color made me sigh a little.  Happy Summer!

Anyways, I finally wrote down a little recipe for my homemade guacamole.  I served it with tortilla chips, a little bit of lime, and some cheese and onion enchiladas.  I hope you enjoy it.

Curvy Guacamole

Serves: ???? depends on how much chips you have

INGREDIENTS

2 ripe avocados

2 cloves garlic, minced

1/2 to 3/4 cup chopped yellow onion (dependent on how much you like onion)

1 large ripe tomato, chopped (I used about 3/4 cup)

1/8 teaspoon cayenne pepper

1/2 teaspoon chili powder

1/2 teaspoon garlic salt

1 teaspoon seasoned salt

1.  Place minced garlic into a large bowl.

2. Peel and remove pits from avocados.  Add avocado meat to the bowl with the garlic and mash together until desired consistency.

3. Add chopped onions to avocado/garlic mixture and mix with spoon.

4. Add tomatoes and mix gently with spoon.

5.  Add remaining spices/salts and stir well.

Now, go find your margarita and enjoy!

August 11, 2010 - 11:08 am

Katy - Love the guac! It looks so good. I add cumin too.

April 29, 2014 - 5:59 pm

Guacamole (A Curvy Carrot Remix) » The Curvy Carrot - […] I wrote the old guacamole post, I was in physical and emotional limbo-living with my parents in my late 20′s because I was […]